Intro: iOS 26 brought camera changes and a refreshed Night mode experience. However, there still aren’t many step-by-step tutorials with actual screenshots showing exactly how to capture stars – especially for people who don’t want to carry a bulky tripod.
Most guides just say: “Use a tripod.” They’re not wrong – tripods are best. But here’s the reality: You don’t always have one with you.
You can absolutely shoot stars without a tripod if you know how to “trick” the iPhone into stabilizing long exposures. In this article, I’ll show you two workflows:
・Tripod method (the reliable baseline)
・No-tripod method (A clever workaround using the timer)

iPhone 16 Pro
iPhone 16 Pro
iPhone 16 Pro

iPhone 16 Pro
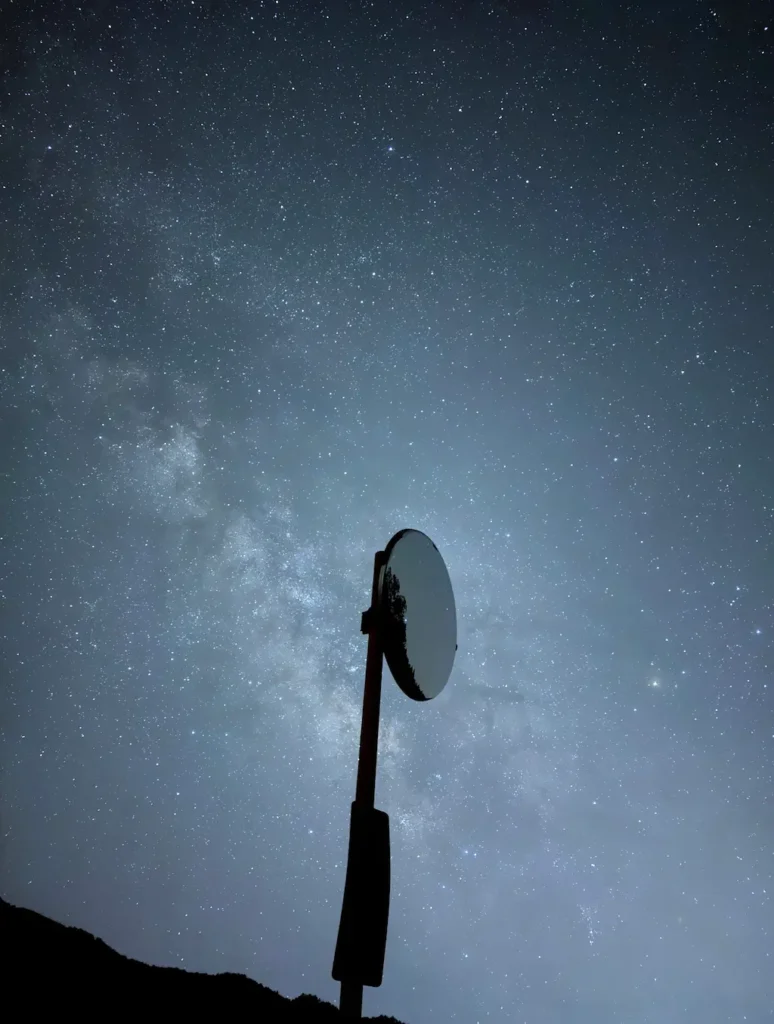
In a truly dark location, an iPhone can capture a sky like this.
iPhone 17
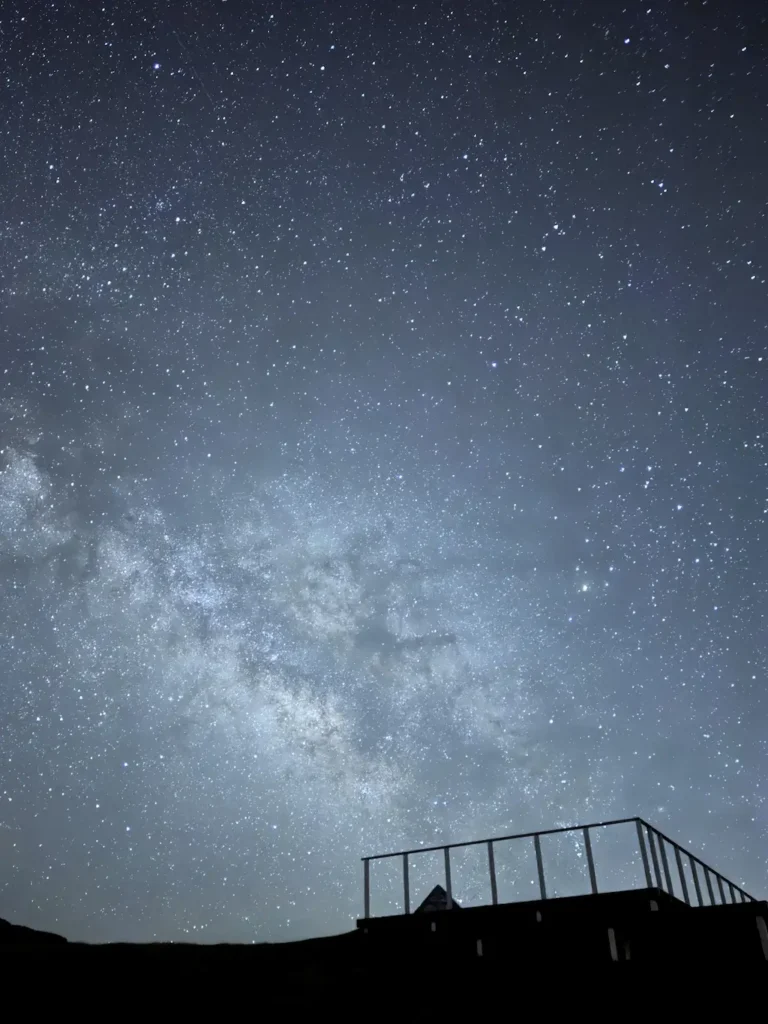
Even the non-Pro model can produce shots like this.
Important Warning: The iPhone 17 currently has a serious issue where it may fail to focus on stars. I personally bought and tested FIVE different iPhone 17 units to confirm this is a widespread defect, not just “bad luck.” [Read my full investigation here([5-Unit Test] iPhone 17 Astrophotography and a Serious Focus Problem)]
Quick Summary: How to Shoot Stars on iOS 26
・Best Lens: Always use the Main Camera (1×) for the best quality.
・Essential Setting: Turn on Night Mode and slide it to “Max” (10s–30s).
・The “No-Tripod” Trick: Set a 10-second timer, press the shutter, then lean the phone against a rock or shoe. This tricks the iPhone into taking a 30-second exposure. ・iOS 26 Note: Look for the yellow “30” number. If it appears, your phone is stable enough for astrophotography.
Before you start: The 3 Golden Rules
1. Darkness Wins: Find a location with minimal light pollution. Even a “pretty dark” suburb is often not enough for the Milky Way.
2. Stability is King: Night mode long exposures are only as good as your stabilization. Any vibration = blurry stars.
3. Patience Required: Stars are tiny moving targets. Expect some trial and error.
Method 1: Shooting Stars With a Tripod
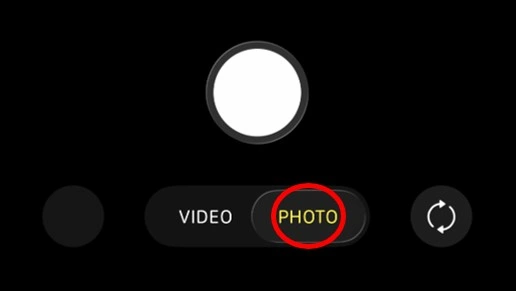
Step 1 – Open the Camera app and select “PHOTO”.
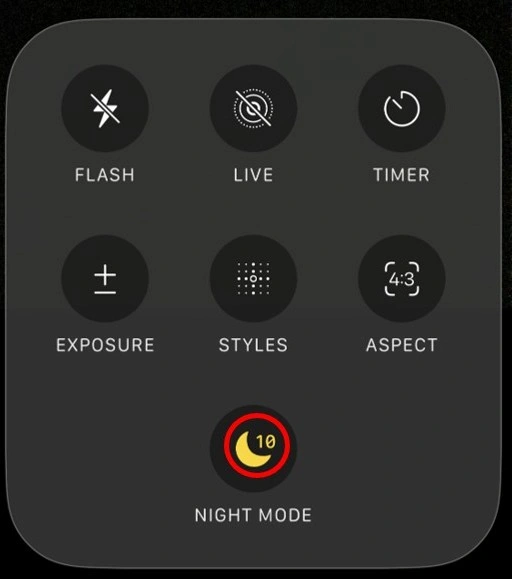
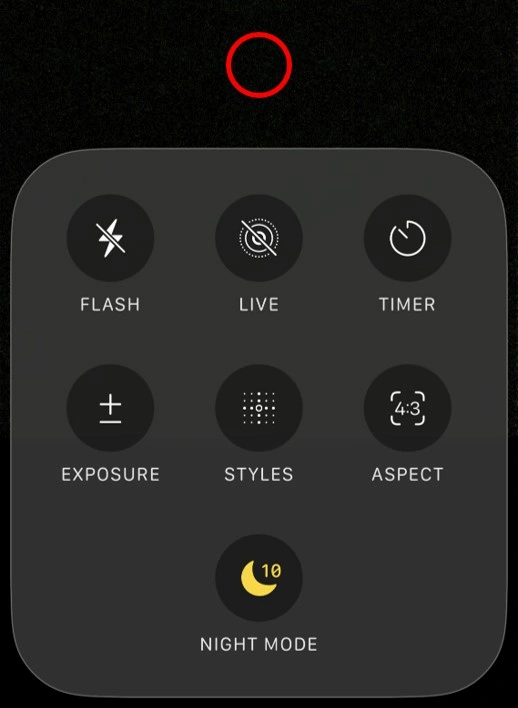
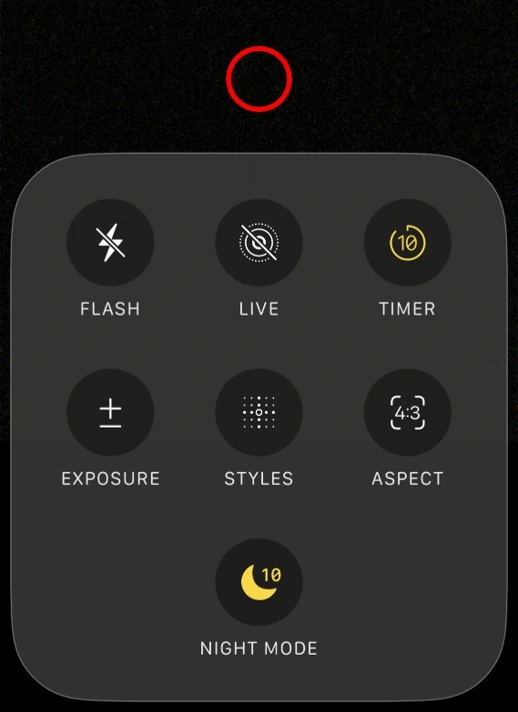
Step 2 – Set Night mode to Max (you’ll see “10”)
On iOS 26, tap the “NIGHT MODE” icon a few times until you see a number like “10” next to it. You may briefly see a message like “NIGHT MODE MAX” at the top. Note: The “10” time only appears in a sufficiently dark scene. If it’s not dark, you’ll see Auto or a shorter time.
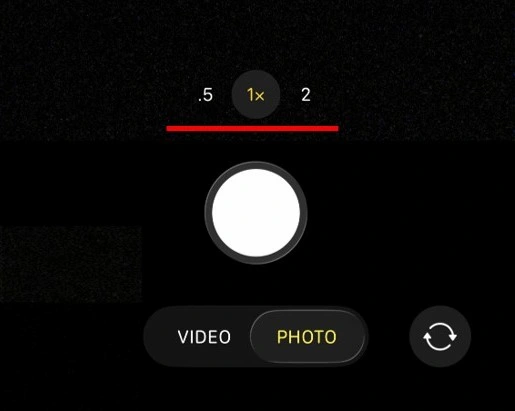
Step 3 – Tap above the frame
Step 4 – Choose the Main Lens (1x)
Always use 1x. It has the largest sensor and lets in the most light. Avoid zooming in, as it degrades quality for stars.
Step 5 – Mount the iPhone, then wait for “30”
You can mount the iPhone earlier, but this is a good time to do it-once Night mode is set, it’s easier to keep everything stable.
Once the phone is fully stabilized on a tripod, iPhone will often extend the exposure time automatically. When the phone is very stable, “30” appears next to the moon icon at the top of the screen.

・If you don’t see “30”, the iPhone still thinks there’s movement.
・Re-tighten the mount, stop touching the tripod, and wait until it becomes stable.
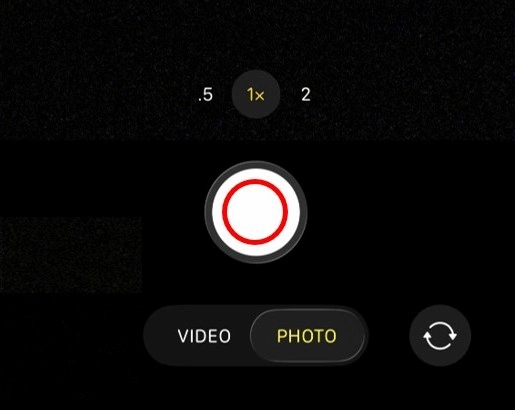
Step 6 – Shoot
Gently press the shutter.
Method 2: Shooting Stars Without a Tripod
You can shoot excellent star photos without a tripod—sometimes even cleaner shots—because the ground is more stable than a cheap, wobbly travel tripod. The key is using the environment. The key is simple:
・A stable prop: A rock, a shoe (sneakers work great), a water bottle, a bench, or just the ground.
・Protection: A case is strongly recommended since you’ll be placing the phone on rough surfaces.
Step 1 – Set Photo + Night mode the same way as the tripod method
Open Camera → “PHOTO”, then tap the “NIGHT MODE” icon until you see “10” displayed.
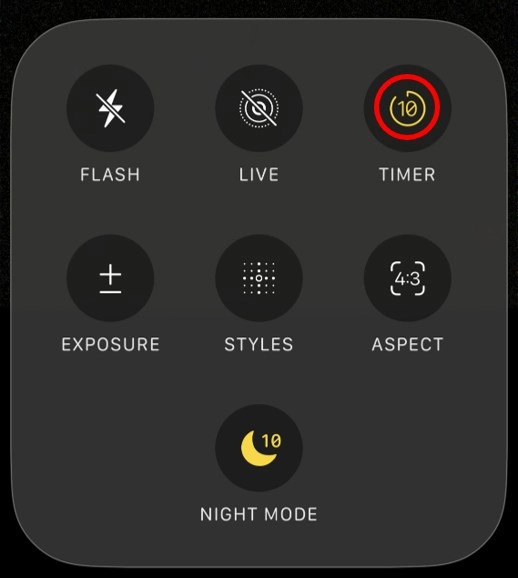
Step 2 – Set a 10-second timer
Set a 10-second timer to give yourself time to stabilize the iPhone before the shot starts. Tap the “TIMER” icon and select 10s.
Step 3 – Tap above the camera controls
Just like the tripod method, tap the blank area above the camera controls.
Step 4 – Set zoom to 1×
Again, 1× is the safest choice for consistent results.
Step 5 – Press the shutter while holding the phone
Press the shutter while holding the iPhone.
Because you set a 10-second timer, you have time to place the phone onto your chosen support.
Step 6 – Lean it into place before the timer ends
After pressing the shutter, quickly place the phone against the surface you picked.
Here’s the most important point:
Critical Tip: “10” can jump to “30” automatically (and fast) When iPhone recognizes the phone is stable, the exposure time can extend from 10 seconds to 30 seconds – sometimes in about one second.
That means: If you can stabilize the phone within ~9 seconds after pressing the shutter, you’re good.
If the screen is facing down (for example, when the phone is on the ground), you may not be able to see the number change. Don’t panic – if the phone is stable, iOS can still switch internally to the longer exposure.
Once it starts, don’t touch the phone. Wait until you hear the final shutter sound.