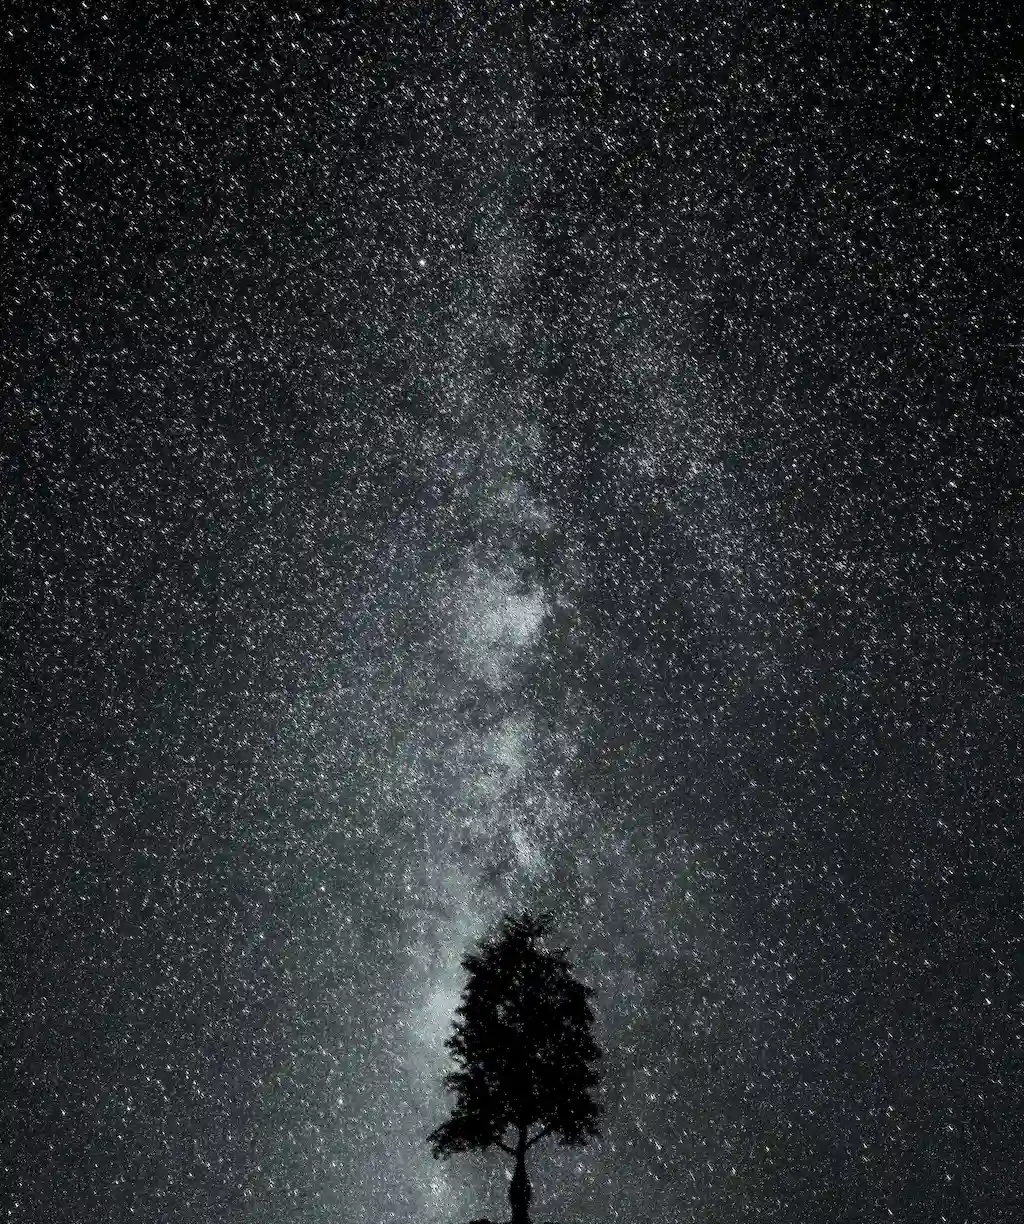
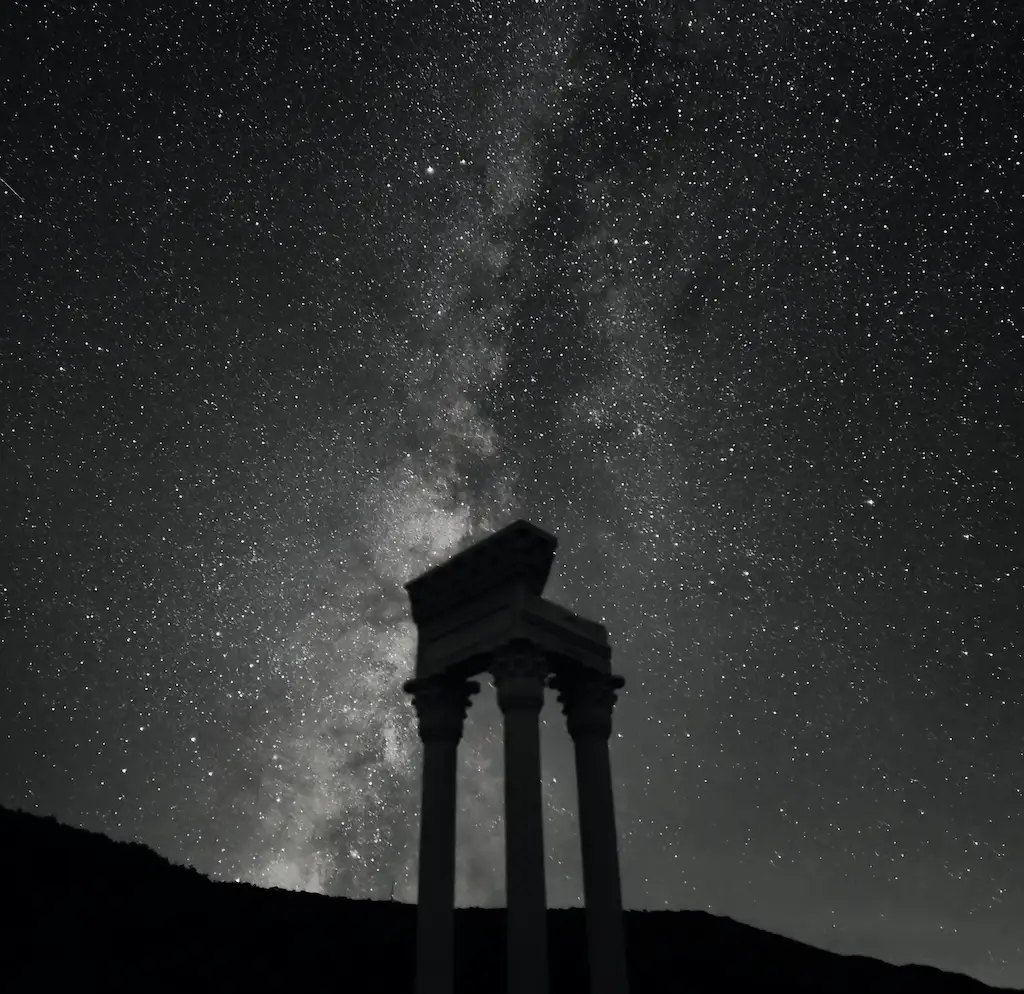
Shot on Galaxy S26 Ultra (Expert RAW)

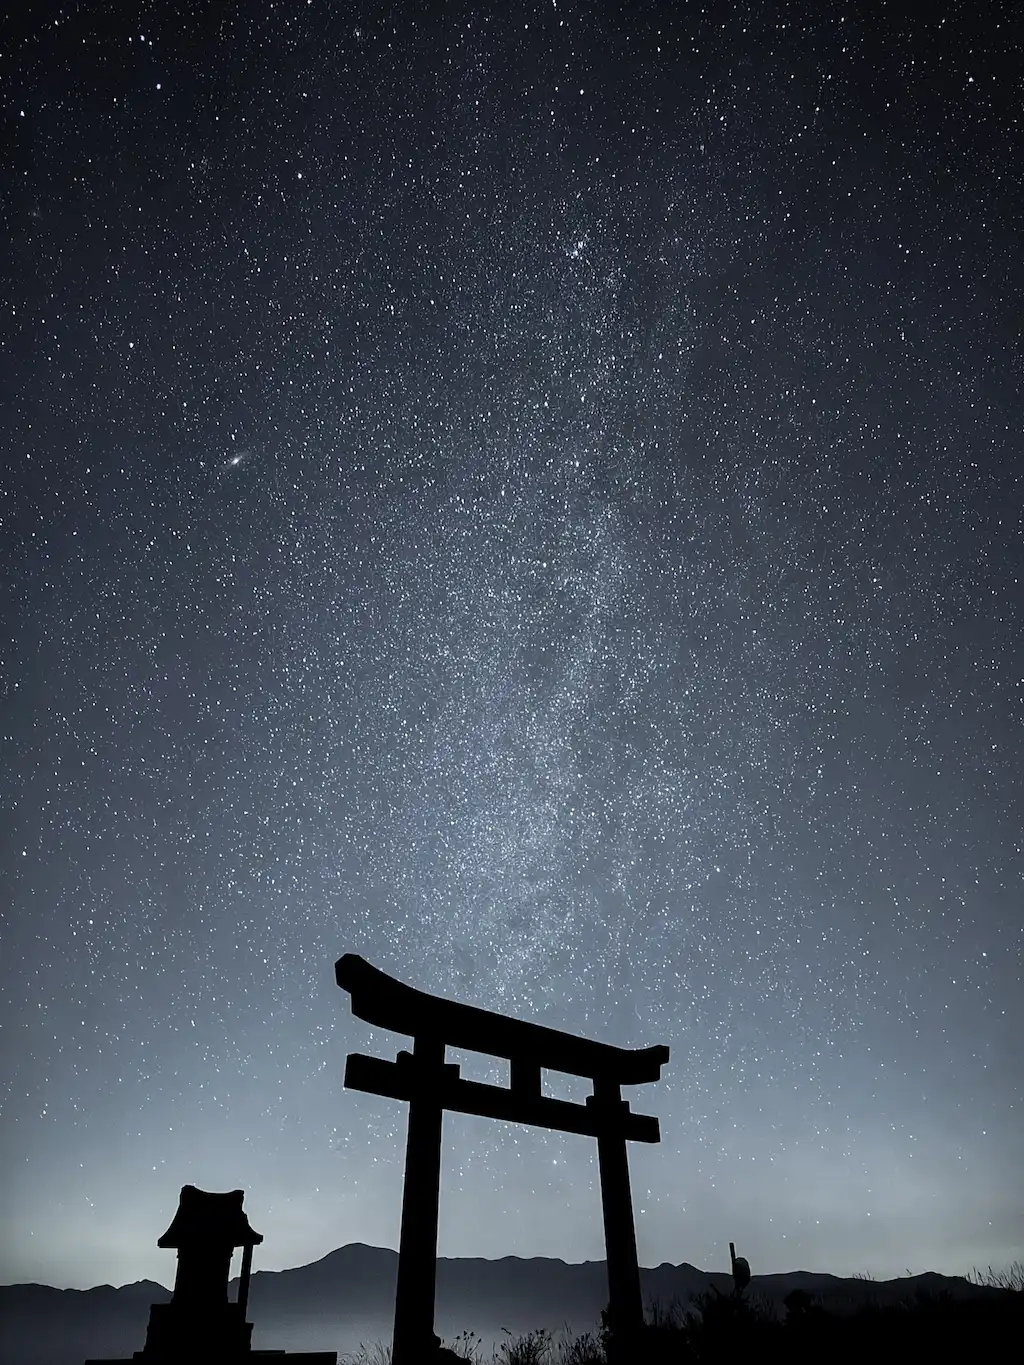
Shot on Galaxy S24 Ultra (Expert RAW)
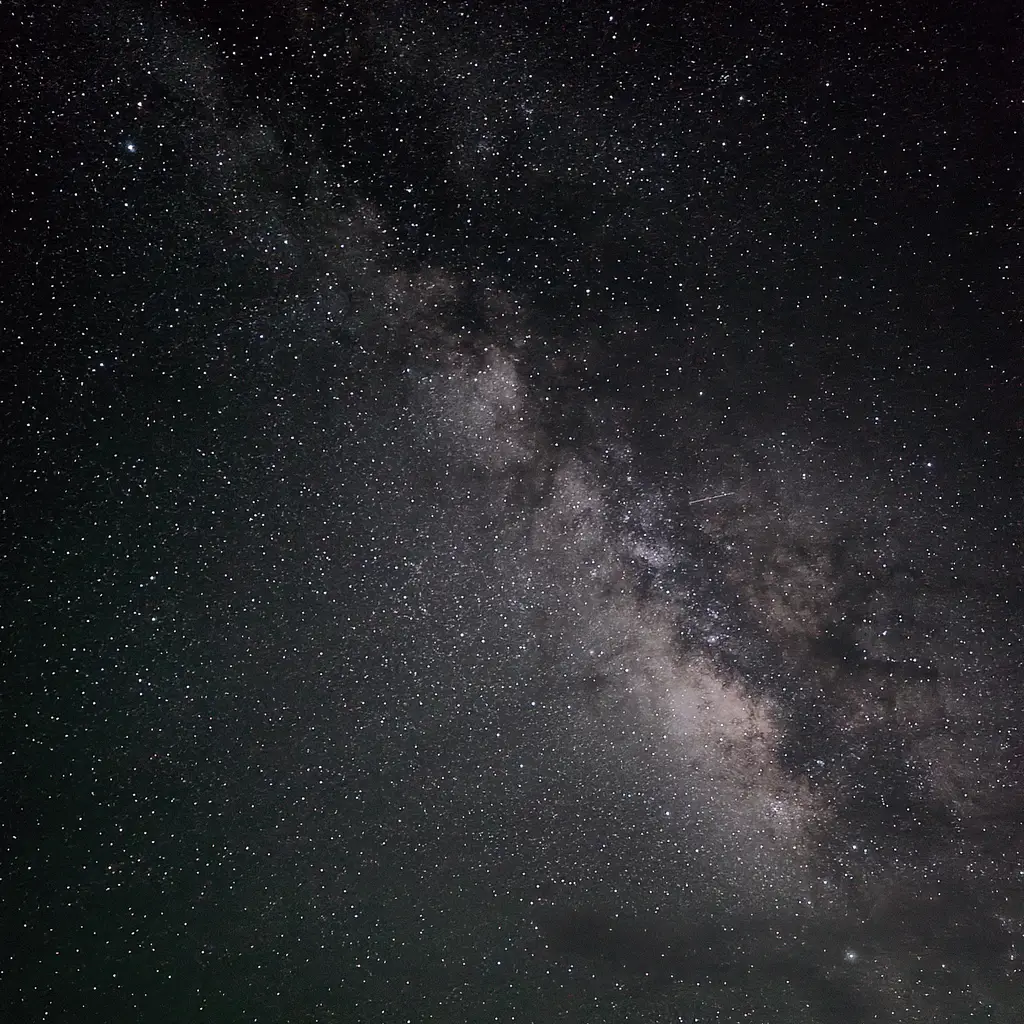
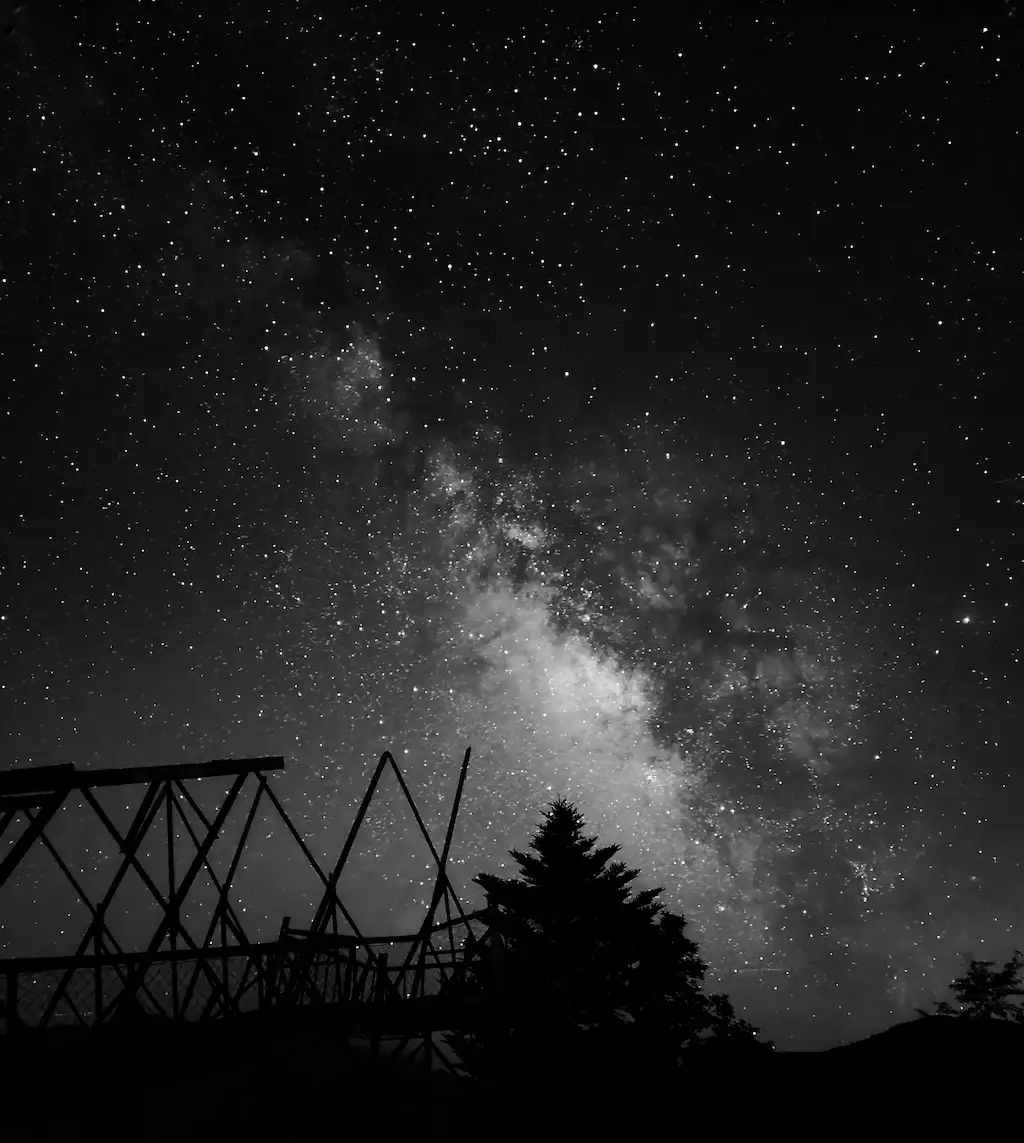
Shot on Galaxy S23 Ultra (Expert RAW)
Samsung has promoted the Galaxy S26 Ultra as featuring the brightest camera system yet in the Galaxy lineup, and in our night-sky tests we confirmed a real improvement in astrophotography. For the full comparison, see our Galaxy S26 Ultra vs S25 Ultra: Astrophotography Test.
What this page is: a quick, visual step-by-step guide for Expert RAW and Pro mode, including no-tripod setup.
You’ll need (keep it simple)
・Galaxy phone that supports Expert RAW
・A dark location (the darker, the better)
・A stable surface (wall / rock /car roof)
・Optional: tripod
For star photography, it is important to keep your phone completely still while shooting.
A tripod is the easiest way to keep it steady. If you do not have one, you can lean your phone against a wall or another stable object.
1) Expert RAW (Astrophotography) — the easiest option
Step 1 Open Expert RAW
Open Camera → More → Expert RAW
If it isn’t installed yet: tap Expert RAW and follow the on-screen prompts to download it. You can also download Expert RAW from the Galaxy Store.
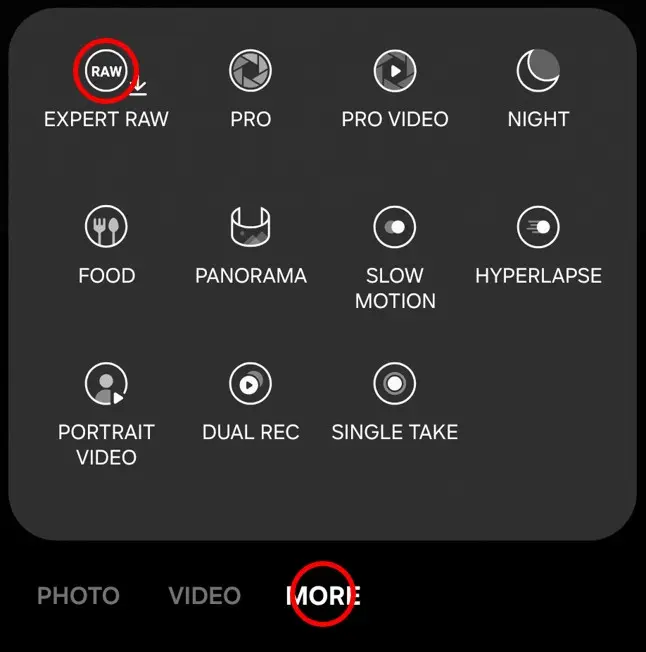
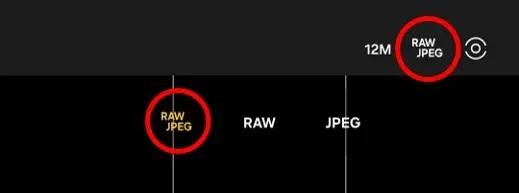
Step 2 Save RAW + JPEG
Tap RAW / JPEG at the top of the screen → choose RAW + JPEG.
Step 3 If you don’t have a tripod
If you’re using a Galaxy Z Fold or Z Flip, Flex Mode is the easiest no-tripod option.
You can place the phone directly on the ground and keep it stable without a tripod.
Shot on Galaxy Z Fold6 using Flex Mode (no tripod)
Flex Mode also makes it easier to shoot from ground level. Even this 30 cm-tall diorama looks like a massive monument when shot from the ground.
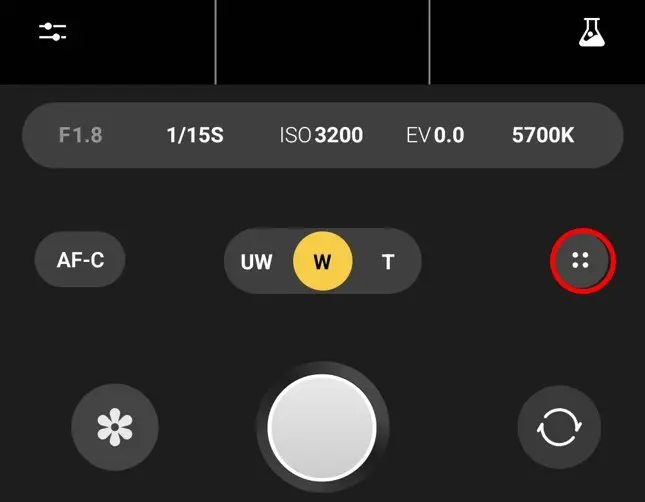
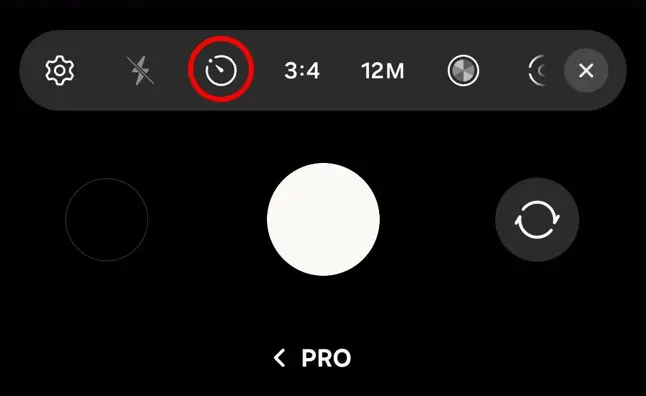
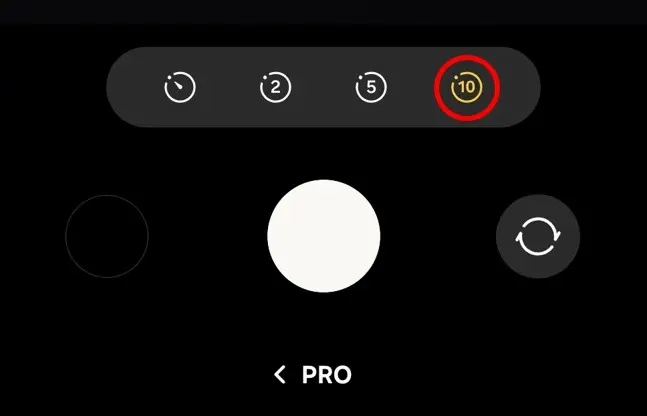
For other Galaxy phones, tap the Settings icon (four dots in a circle on many models).
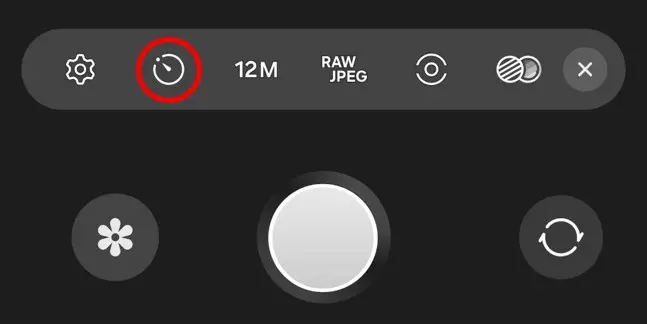
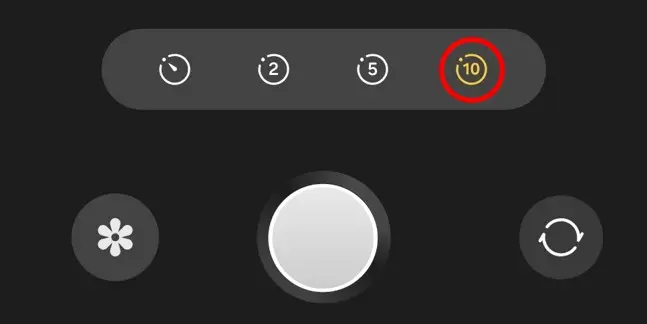
Turn on Timer → set to 10s.
(If you do not have a tripod, this gives you time to place the phone in a safe and stable position after pressing the shutter button.)
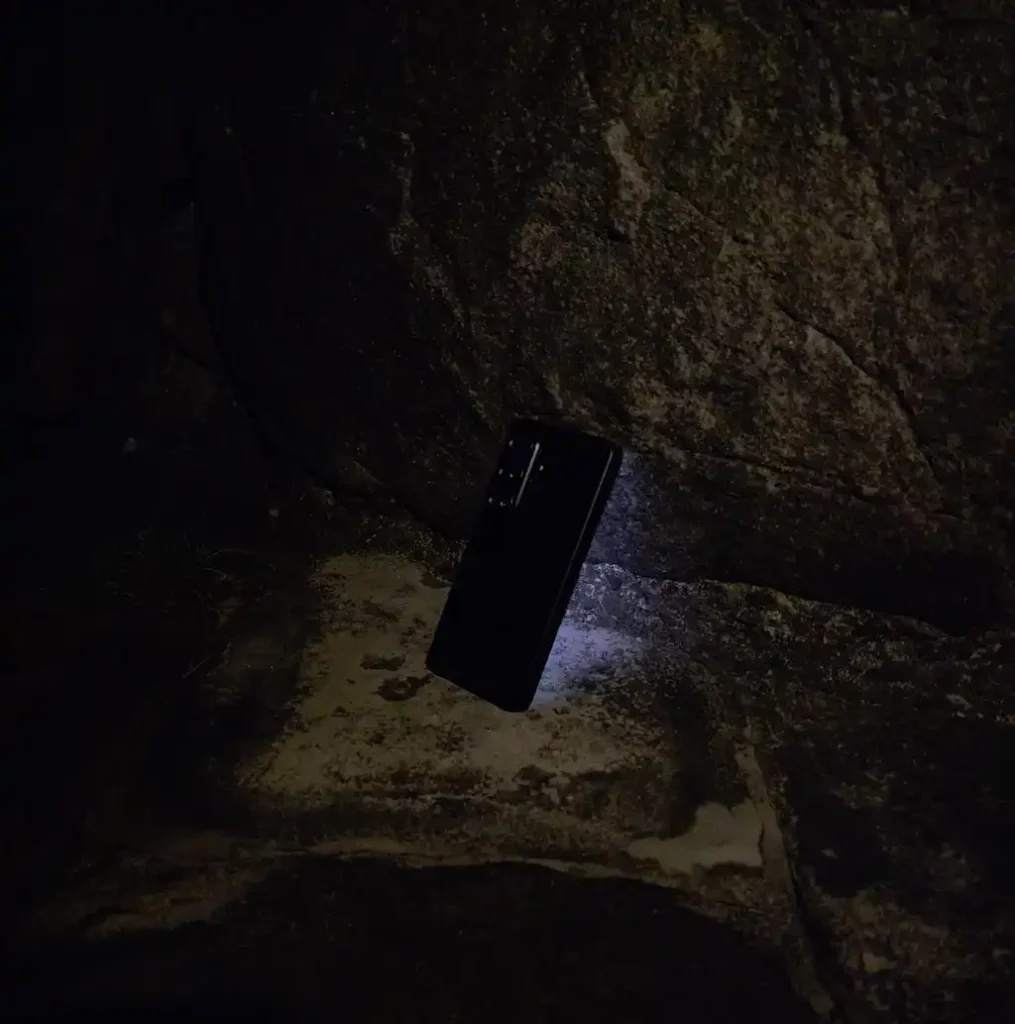
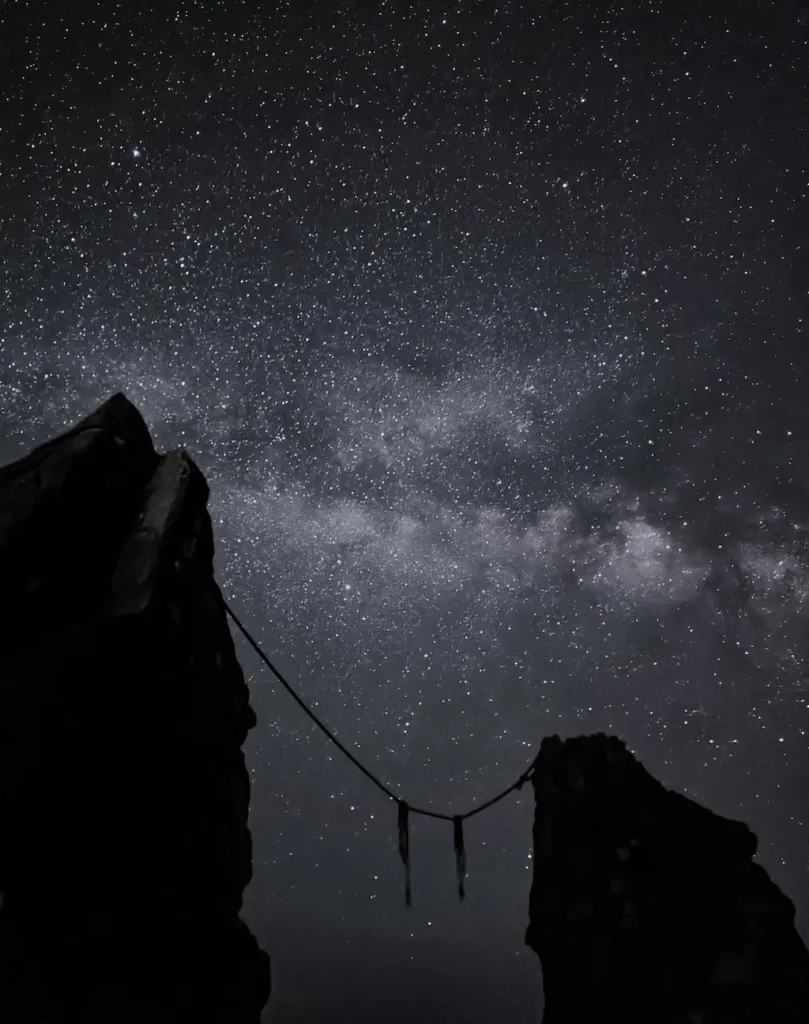
Here is a real no-tripod setup. I leaned the Galaxy S26 Ultra against a rock and used the 10-second timer to place it safely and keep it stable. This is the photo taken from that setup.
Galaxy S26 Ultra leaned against a rock.
Shot from the setup above with Expert RAW.
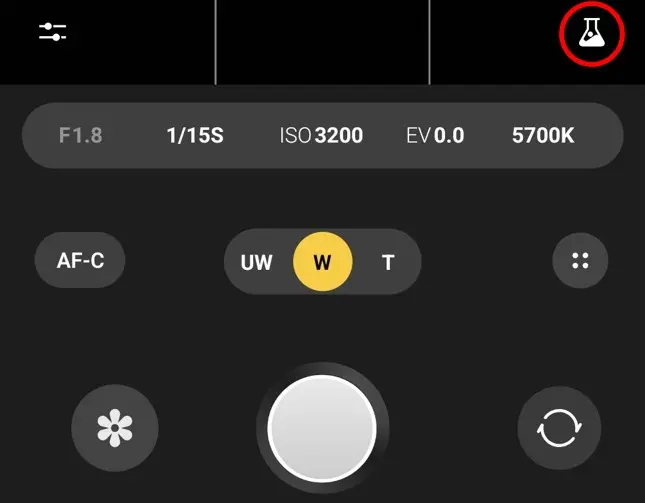
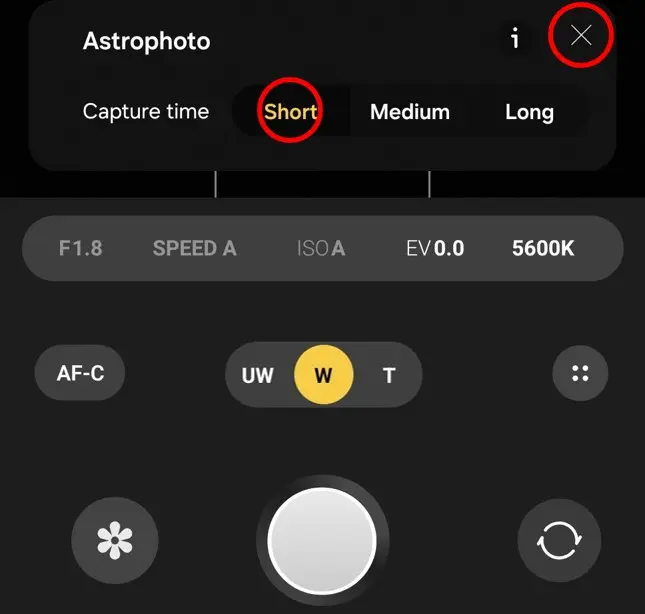
Step 4 Enable Astrophotography mode
Tap the Labs icon (flask) → Astrophotography → ON
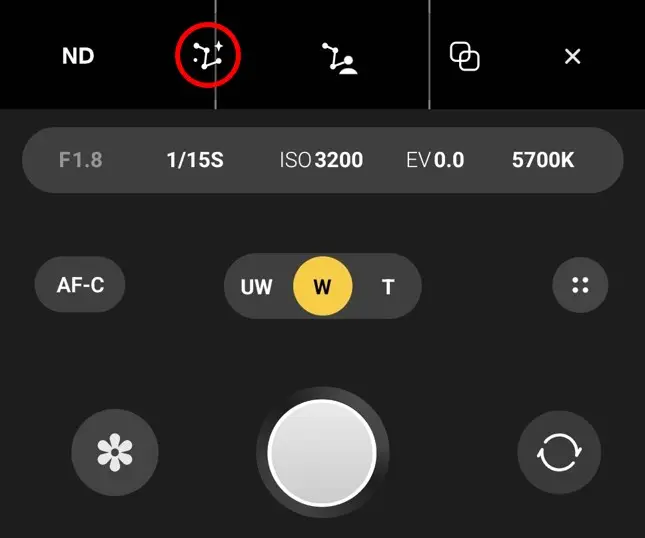
Step 5 Capture time: choose “Short”
Set Capture time to Short
(Long often doesn’t look dramatically better, and takes longer.)
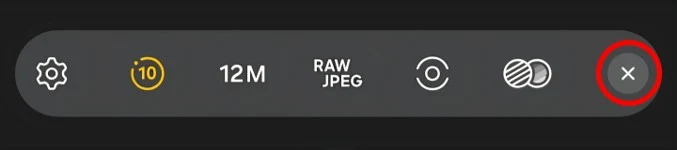
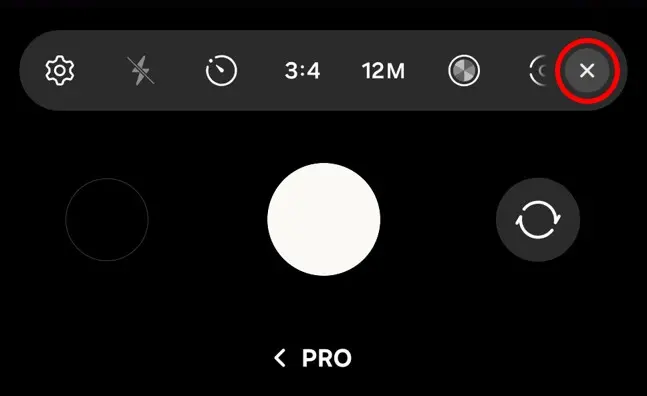
Then close settings (✕) to return.
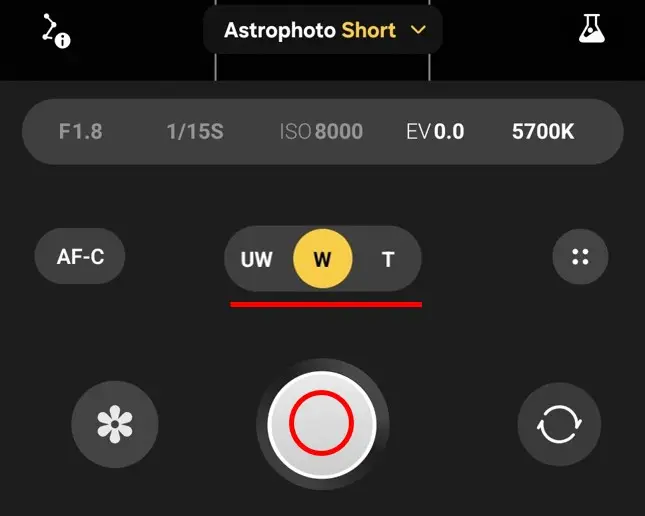
Step 6 Frame and shoot
Choose your lens / framing → press the shutter.
No tripod tip: after tapping shutter, place the phone firmly against a wall or on a stable support within the 10s timer.
Quick edit (built-in Gallery)
Open the Gallery app → Albums → Expert RAW → pick the photo with the RAW mark in the lower-left corner.
(If you do not see the Expert RAW album, tap View all. It may appear there.)

(You can also open Gallery → Pictures and choose a photo with the RAW mark.)
Tap Edit (pencil)

Adjust lightly, such as Contrast, Highlights, and Shadows. When finished, tap Done.
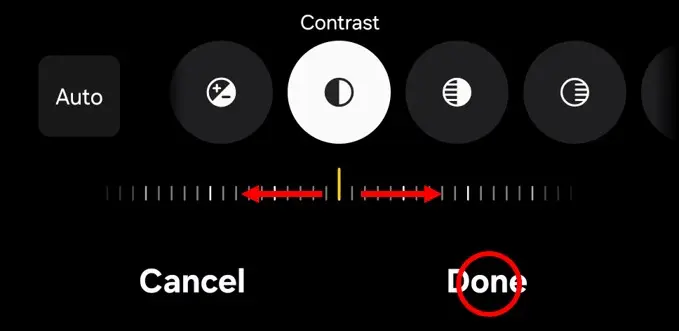
Tap Save copy at the top of the screen.

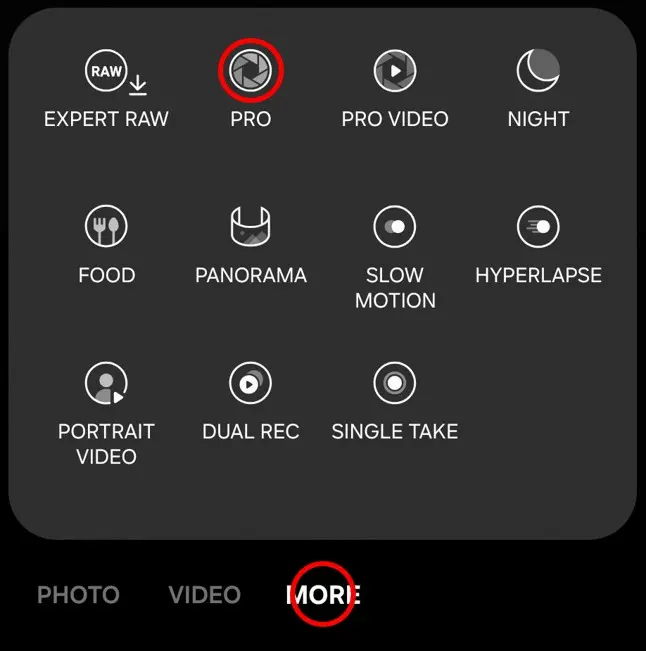
2) Pro Mode — still great (often enough)
Step 1 Open Pro mode
Camera → More → Pro
Step 2 No tripod: timer again
Same idea as above: if you use a Galaxy Z Fold or Z Flip, Flex Mode can help stabilize the phone without a tripod. Otherwise, use a 10s timer.
Tap the Settings icon (four dots in a circle) → Timer → 10s → close (✕)

Step 3 Set ISO + Shutter speed
Set your framing first, then adjust ISO and Shutter.
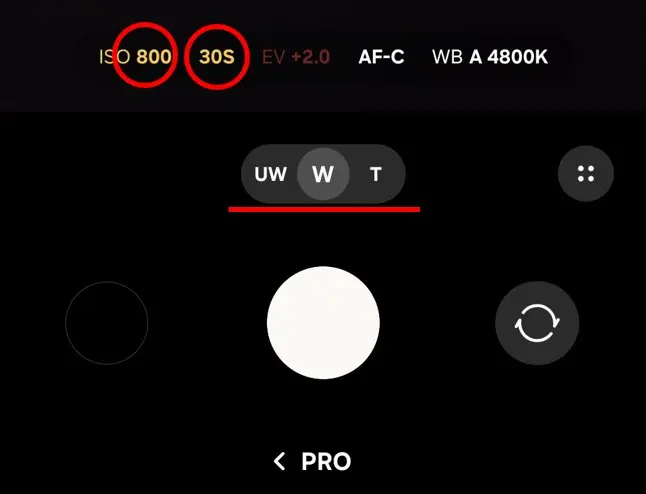
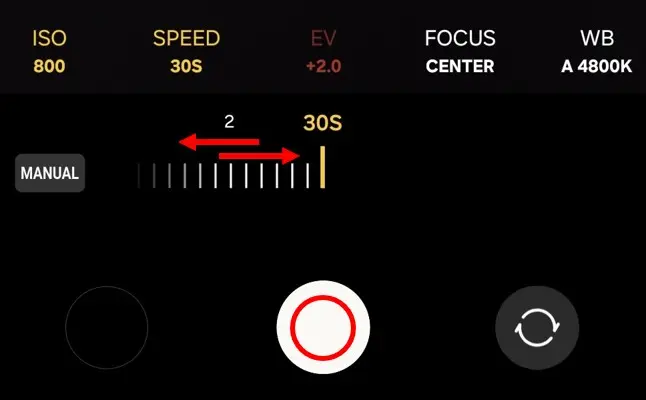
Important: Many guides say “high ISO + 30s shutter.” On phones, this often looks worse after editing.
A low ISO can look almost black on the screen. That is OK. The stars are still in the file. You can bring them out in editing.
Try this as a starting point:
・Shutter: 30s
・ISO: 400 (dark skies) / 800–1600 (brighter skies or quick results)
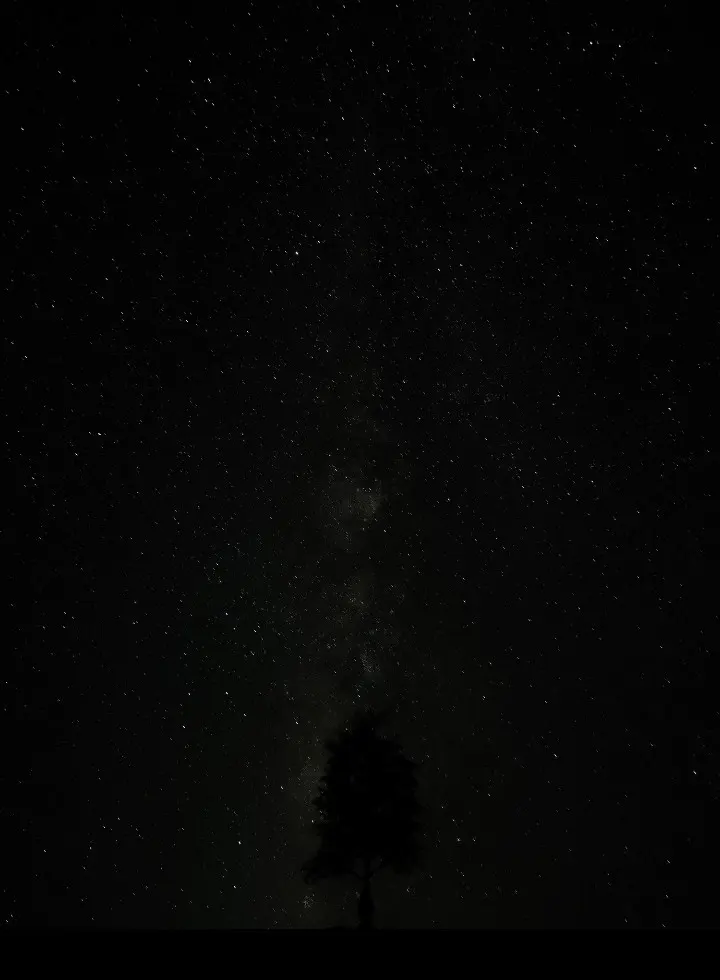
Example: ISO 400, before and after editing
Shot on Galaxy S25 Ultra (Pro Mode, 30s, ISO 400). Straight out of the camera.
Same photo, edited in Samsung Gallery.
(Light balance +80 / Brightness +80 / Shadows −10 / Saturation −40 / Temperature −70)
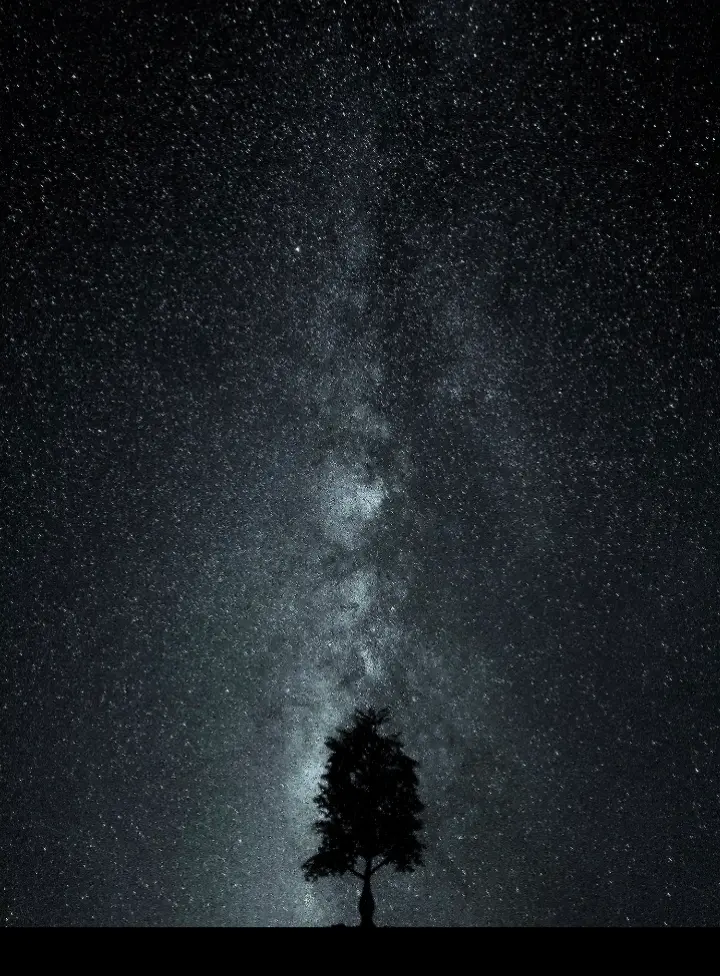
The preview looked dark. The final image is not.
Want the full ISO comparison (400 vs 800 vs 1600 vs 3200) and why I expose this way? See: Galaxy Astrophotography: ISO 400 vs 1600 for Stars & the Milky Way (Why I Don’t Expose by the Viewfinder)]
Note
UI labels and icons may vary by One UI version and device model. The steps are written so you can match what you see on-screen.