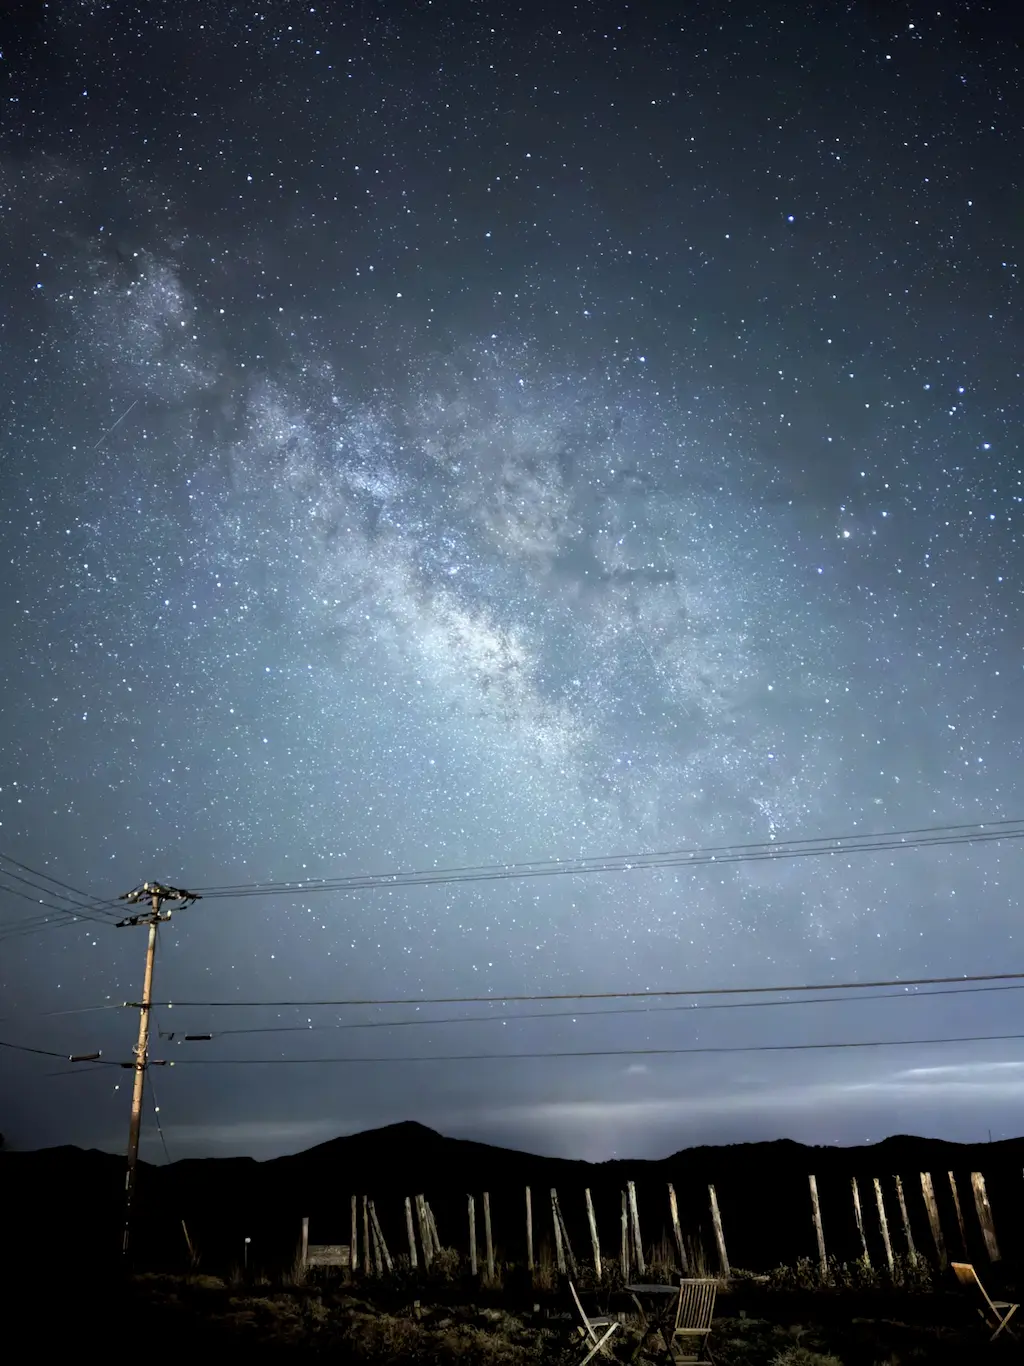
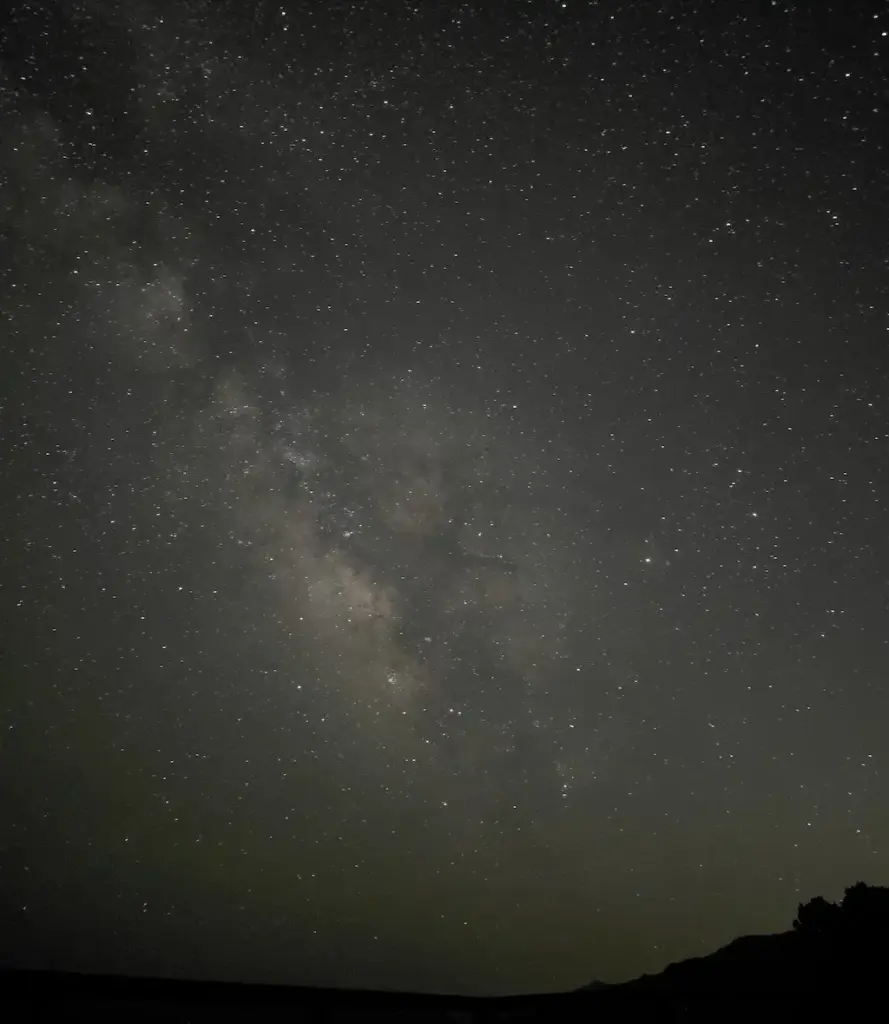
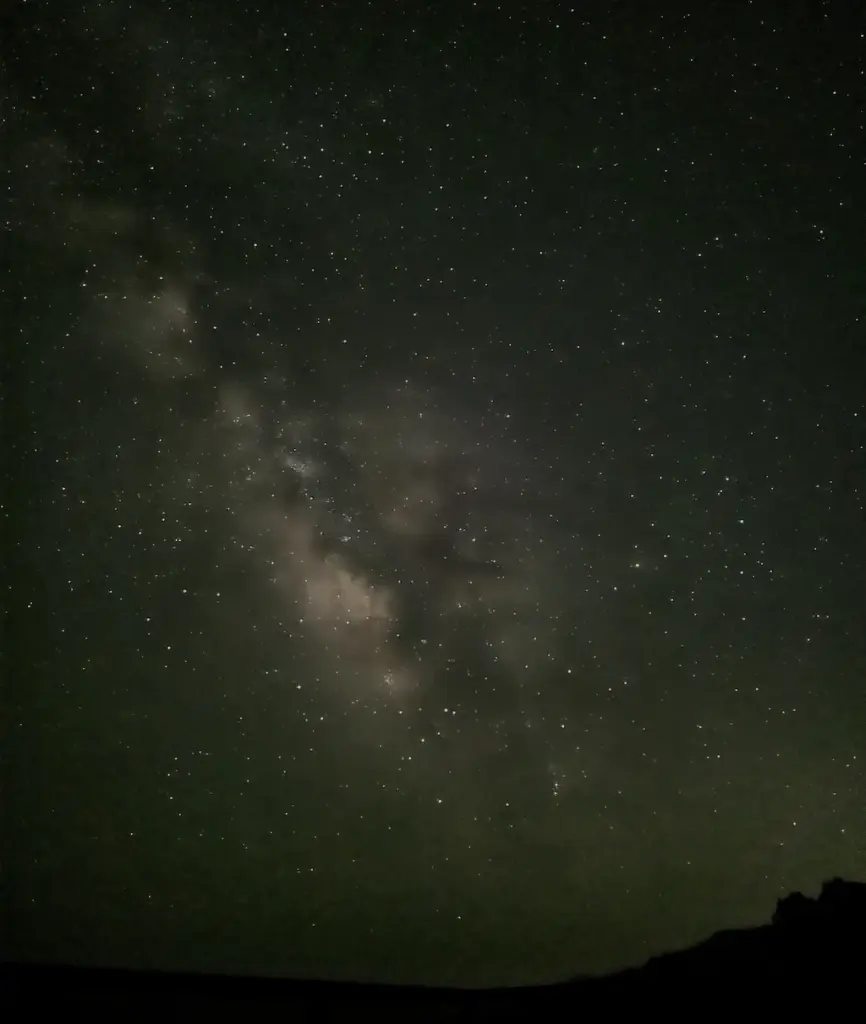
Example result (Galaxy S25 Ultra, Pro Mode, 30s, ISO 400, edited in Samsung Gallery).
This article explains why I expose for the edit rather than for a bright viewfinder preview.
1. Introduction: Viewfinder Exposure vs Editing Headroom
Samsung’s official tips for Galaxy night photography often suggest adjusting settings until the viewfinder preview looks “right”. This is practical for quick results because the image on the screen becomes bright and easy to compose.
However, many general astrophotography guides (not only Samsung-related) often recommend around ISO 1600 as a starting point, because it produces an immediately visible star field and Milky Way on the phone screen.
This article focuses on a different goal: an editing-first result. In that workflow, a bright preview is not always the best target. Under dark skies, a lower ISO can sometimes preserve more headroom to create:
・a darker sky background,
・clearer separation between stars / Milky Way structure and the sky base,
・and stronger contrast after editing.
This is not a claim that “ISO 400 is always best.” It is a report of what worked better in my conditions and for my editing goal.
2. Test Location and Method
I tested in a very dark location in Japan (low light pollution).
To compare ISO behavior, I used Galaxy Pro Mode and fixed:
・Shutter speed: 30 seconds (constant)
・ISO: 3200 / 1600 / 800 / 400 (changed only ISO)
ISO:3200
ISO:1600
ISO:800
ISO:400
3. Why I Don’t Set ISO to Match the Viewfinder
The viewfinder is useful for framing, but it is not a reliable judge of how well a file will edit. If you raise ISO mainly to make the preview bright, you may reduce flexibility when you later try to keep the sky dark while bringing out stars and Milky Way detail.
At a truly dark site, ISO 400 can look almost black on the screen. Many users increase ISO immediately so they can “see” more. My approach is to accept a dark preview and prioritize a file that edits well.
4. ISO Comparison (30s Fixed)
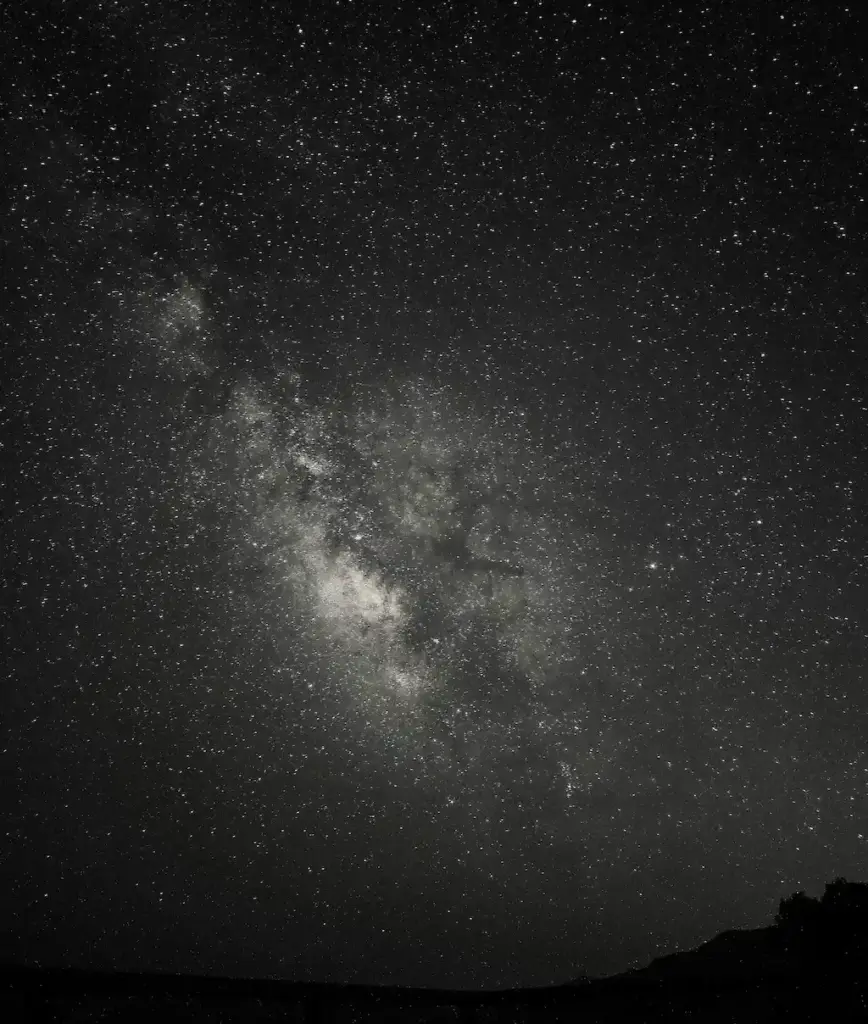
ISO 3200
Even under a dark sky, ISO 3200 can make the sky base look bright and “washed.” In editing, it becomes difficult to keep a deep sky background while emphasizing stars and Milky Way structure. The result often becomes either:
・overall too bright/gray, or
・overly crushed to black.
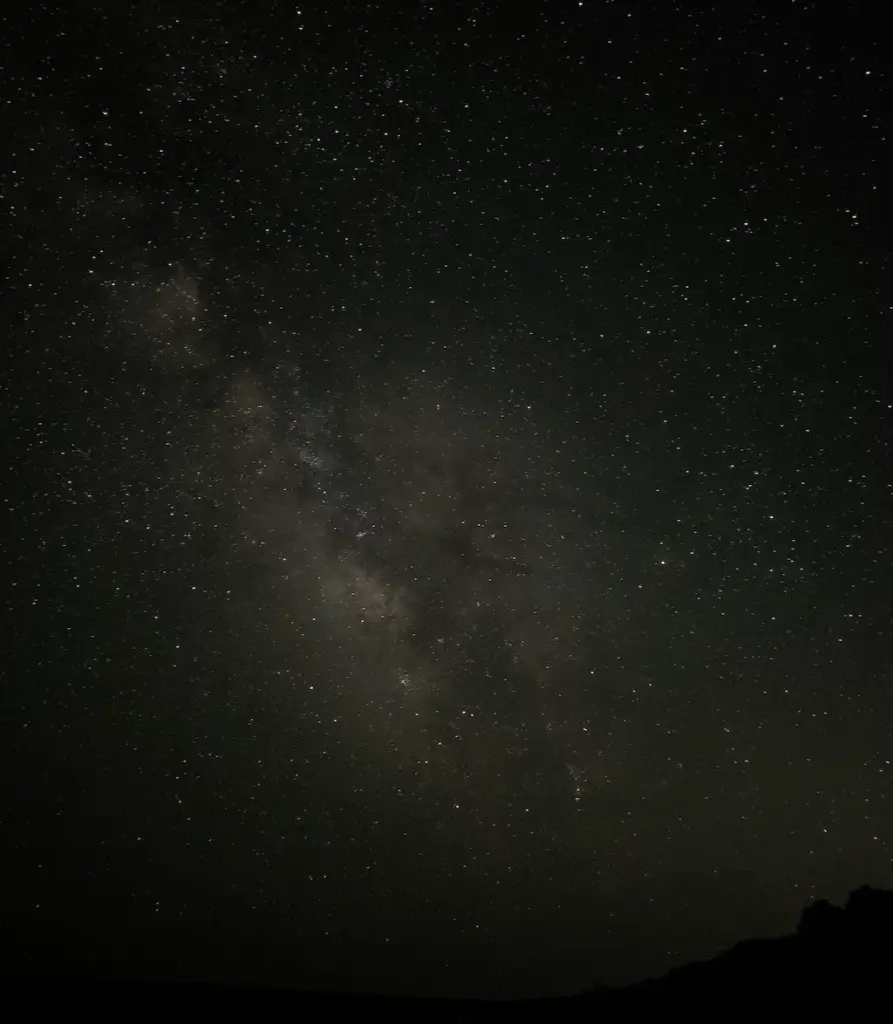
ISO 1600 (commonly recommended)
ISO 1600 is widely recommended because it produces an easy-to-see preview and can look good with minimal editing. In my tests, it showed many stars and the Milky Way, but after editing the separation between the sky base and bright structures (dense star areas / Milky Way core) was weaker than I wanted. The final image felt less “deep” and less dramatic.
ISO 800
ISO 800 is darker than ISO 1600. In my results, it reduced brightness but did not give the same editing flexibility and “depth” that I could get from ISO 400.
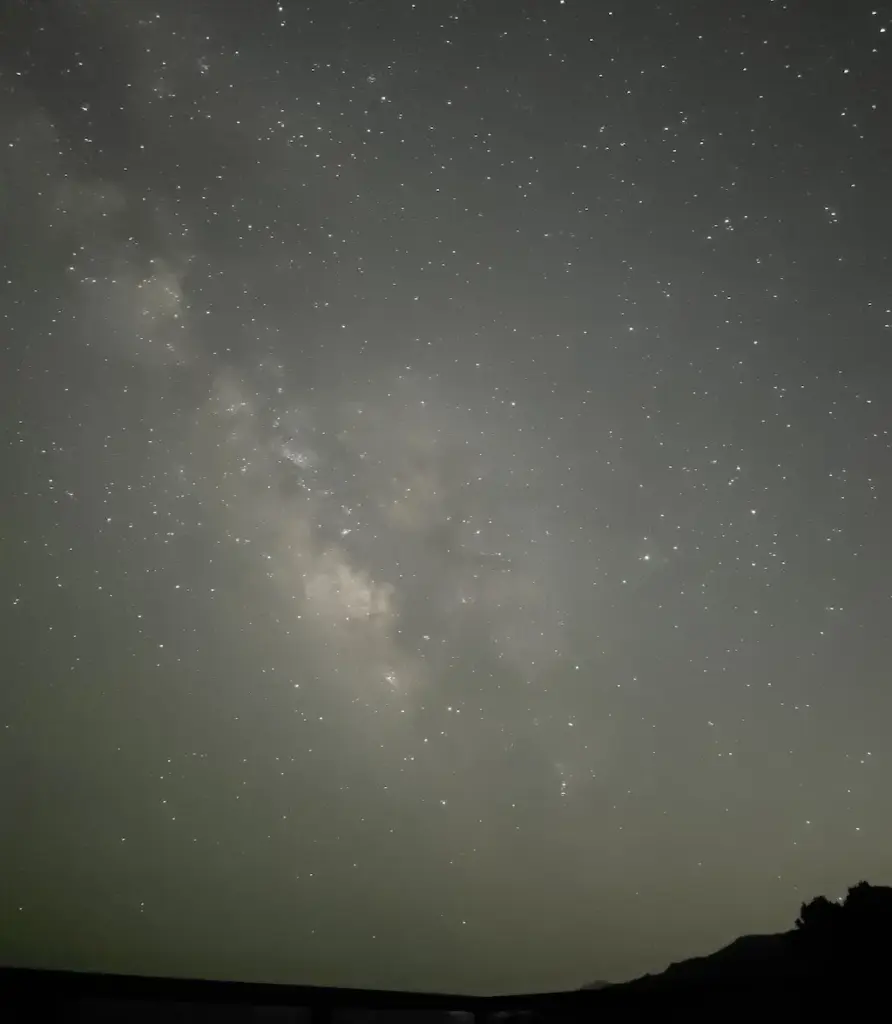
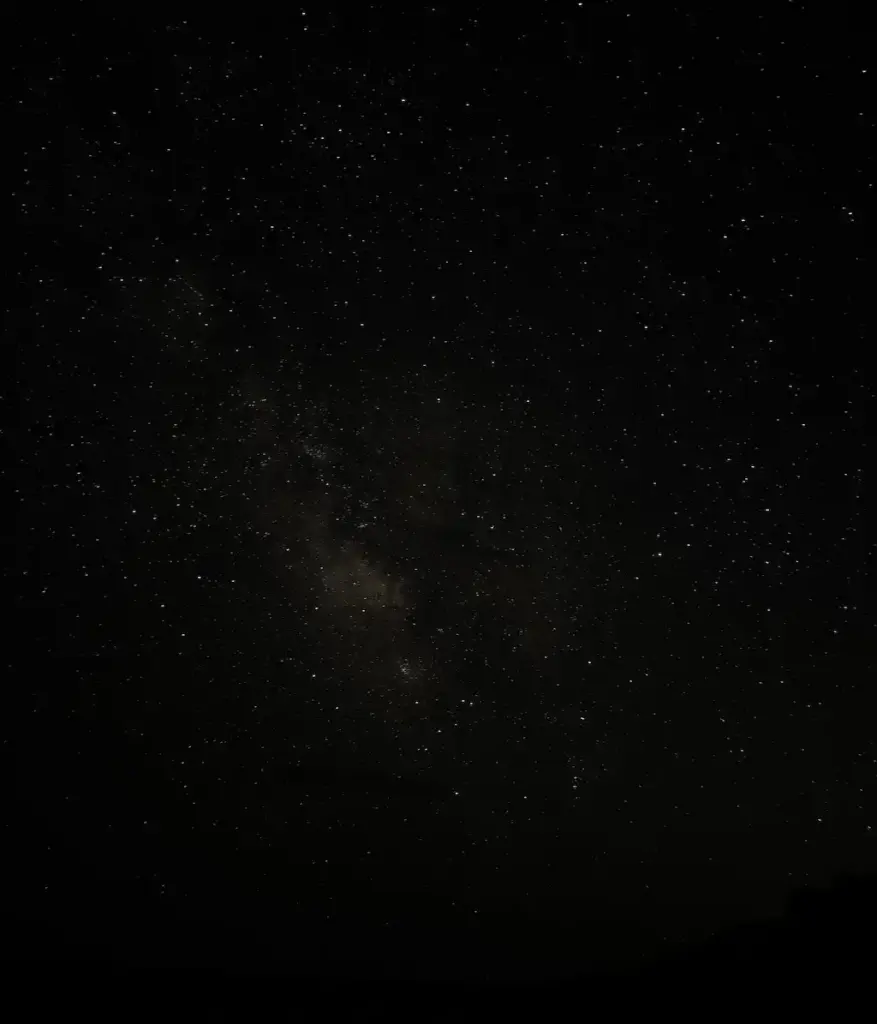
ISO 400 (unedited)
ISO 400 can look like a failed dark photo. However, the star field and Milky Way information may still be present. The key is to extract it in editing while keeping the sky background dark.
5. ISO 400 Before & After (Edited in Samsung Gallery)
ISO 400 before
ISO 400 After
The edited image below is the ISO 400 file processed in the Samsung Gallery app (no Lightroom required).
Example settings:
・Light balance: +60
・Brightness: +60
・Saturation: -70
・Hue: +25
・Clarity: +25
With ISO 400, I could reveal stars and Milky Way structure while maintaining a darker sky background. With ISO 800–3200 (at the same 30s shutter), I could not achieve the same balance in my edits.
This is why “adjust ISO until the viewfinder looks right” can be limiting for an editing-first workflow.
6. Pro Mode vs Expert RAW (Faint Stars and Fine Structure)
Pro Mode ISO 400 edited
Expert RAW
In my samples, Pro Mode (ISO 400 + edit) preserved more faint stars and more fine structure in bright star areas / Milky Way texture. Expert RAW looked cleaner, but it also looked smoother, and faint stars were less visible.
Pro Mode ISO 400 edited zoom
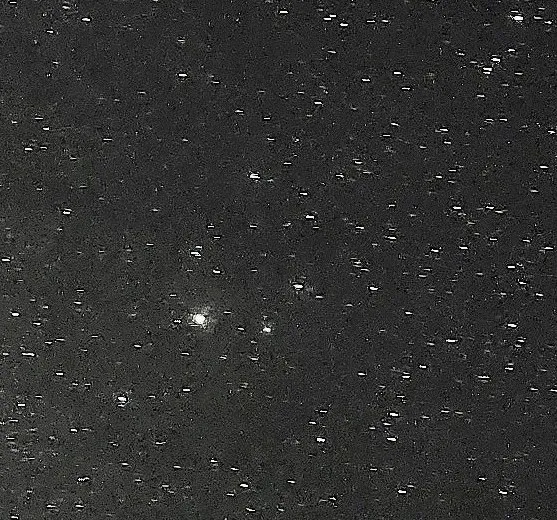
Expert RAW zoom
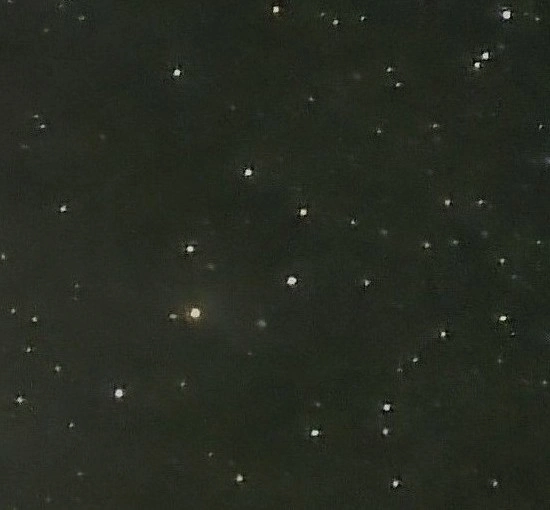
When zoomed in, the difference is obvious: Pro Mode shows far more small, faint stars than Expert RAW.
I cannot confirm Samsung’s internal processing, but the difference is consistent with stronger noise reduction / smoothing that may reduce very small bright points. This can produce a cleaner image, but it may also reduce faint star detail.
Note on star movement (30 seconds)
At 30 seconds, star movement (trailing) can appear. If this is a problem, shorten shutter speed and adjust ISO accordingly.
7. Conclusion
A viewfinder-based rule (“adjust ISO until the preview looks right”) is useful for quick night photos. But for astrophotography—especially if the goal is a dark sky background with strong stars and Milky Way contrast after editing—the preview is not always the best exposure target.
ISO 1600 is commonly recommended and can be practical when:
・you want a brighter preview and quick sharing,
・the sky is brighter (light pollution / moonlight),
・or you prefer minimal editing.
In my dark-sky tests, ISO 400 provided more editing headroom. Even though the preview looked too dark, the final edited result kept a darker sky base while revealing stars and Milky Way structure more clearly than ISO 1600 at the same 30-second shutter.
Practical guideline (simple):
・For an editing-first, dramatic result under dark skies: try ISO 400–800, then edit.
・For quick results or brighter skies: ISO 800–1600 is often easier.