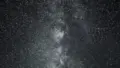

Shot on Galaxy S26 Ultra (Expert RAW)

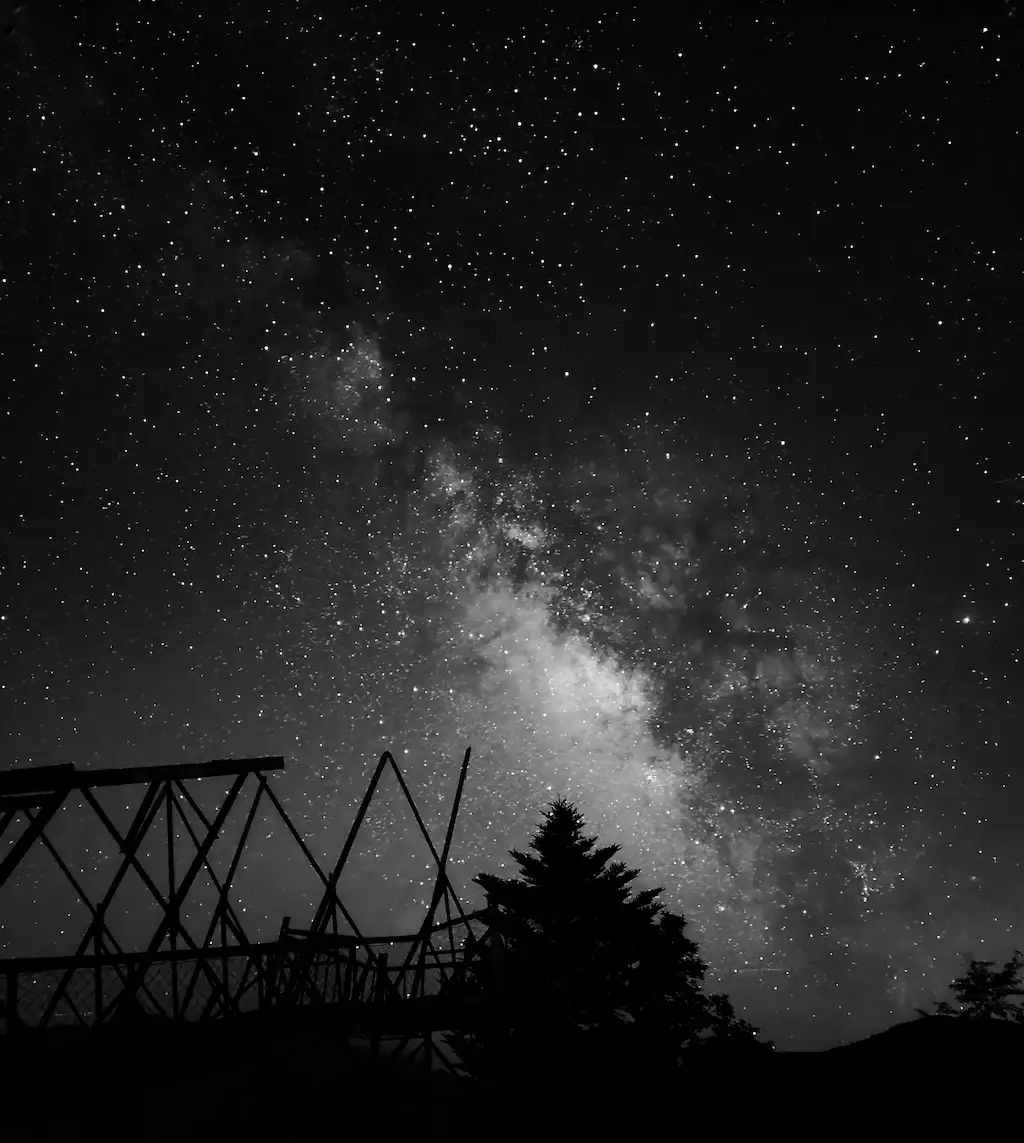
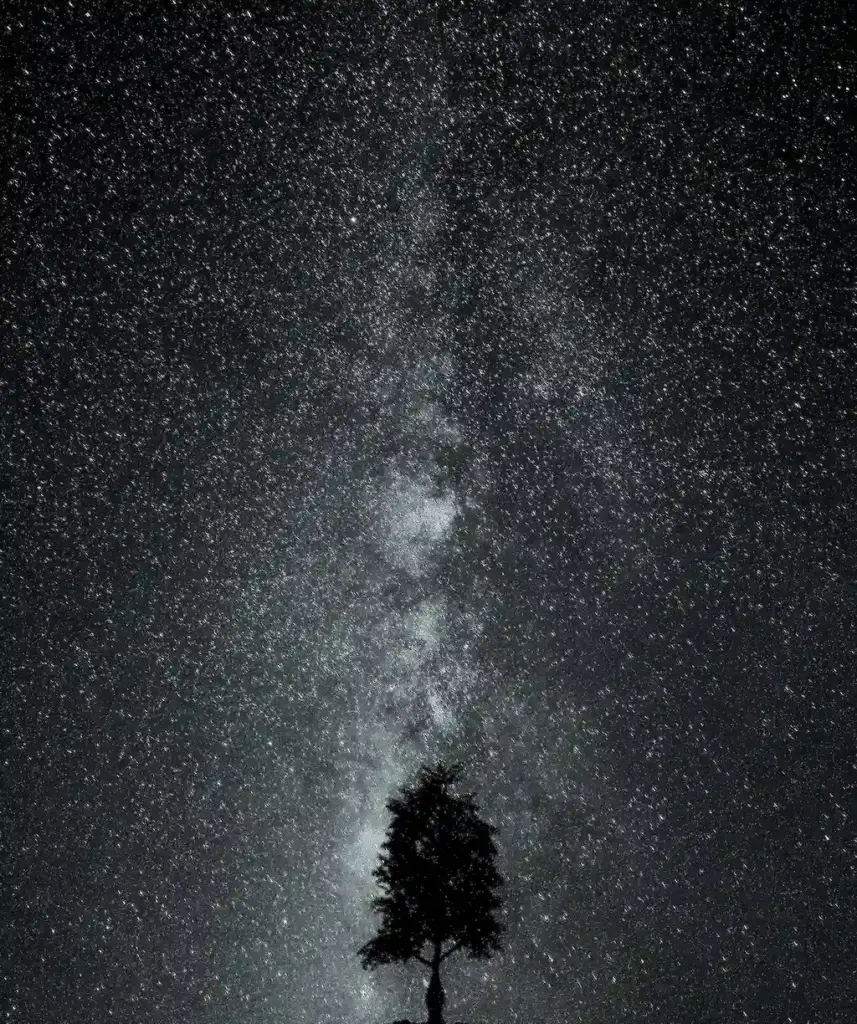
Shot on Galaxy S24 Ultra (Expert RAW)
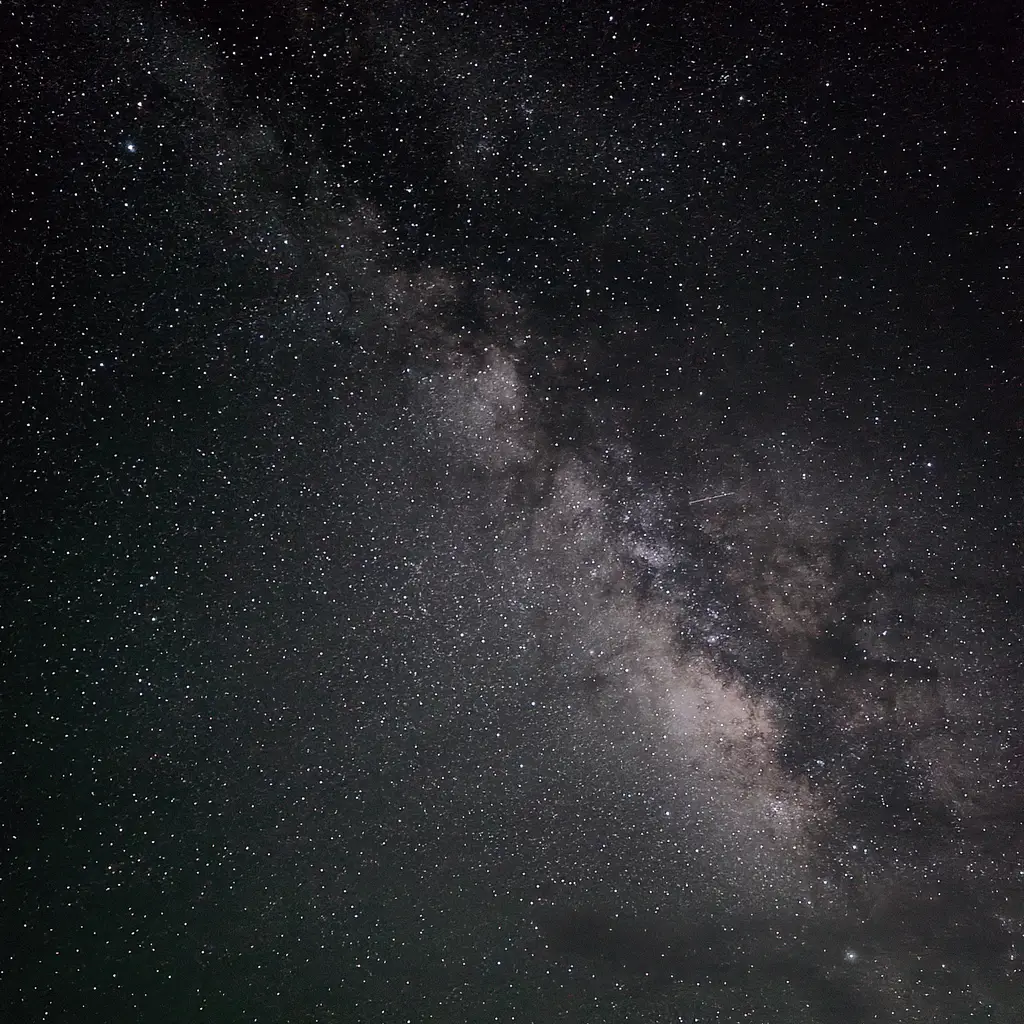
Shot on Galaxy S23 Ultra (Expert RAW)
Samsung has promoted the Galaxy S26 Ultra as featuring the brightest camera system yet in the Galaxy lineup, and in our night-sky tests we confirmed a real improvement in astrophotography. For the full comparison, see our Galaxy S26 Ultra vs S25 Ultra: Astrophotography Test.
What this page is: a quick, visual step-by-step guide for Expert RAW and Pro mode, including no-tripod setup.
You’ll need (keep it simple)
・Galaxy phone that supports Expert RAW
・A dark location (the darker, the better)
・A stable surface (wall / rock /car roof)
・Optional: tripod
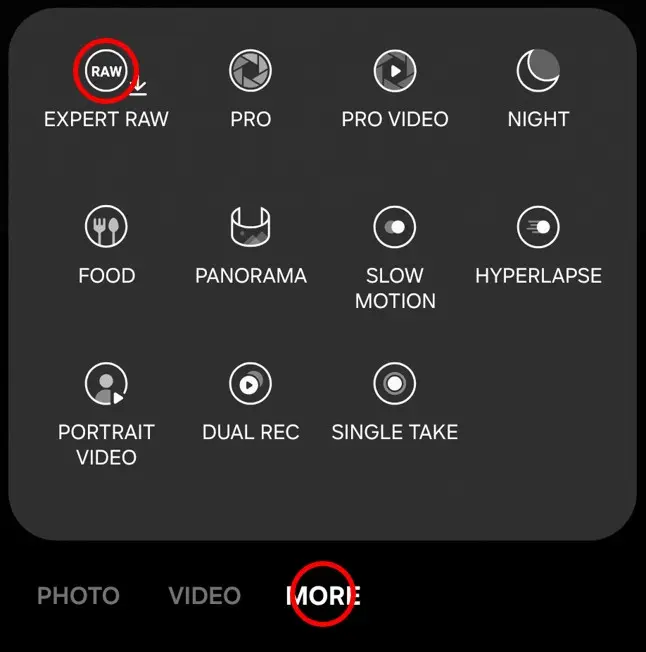
1) Expert RAW (Astrophotography) — the easiest option
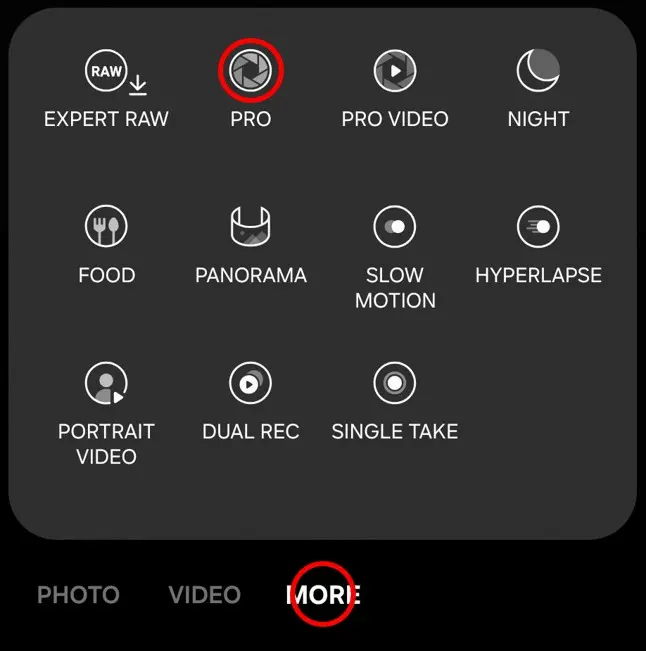
Step 1 Open Expert RAW
Open Camera → More → Expert RAW
If it isn’t installed yet: tap Expert RAW and follow the on-screen prompts to download it. You can also download Expert RAW from the Galaxy Store.
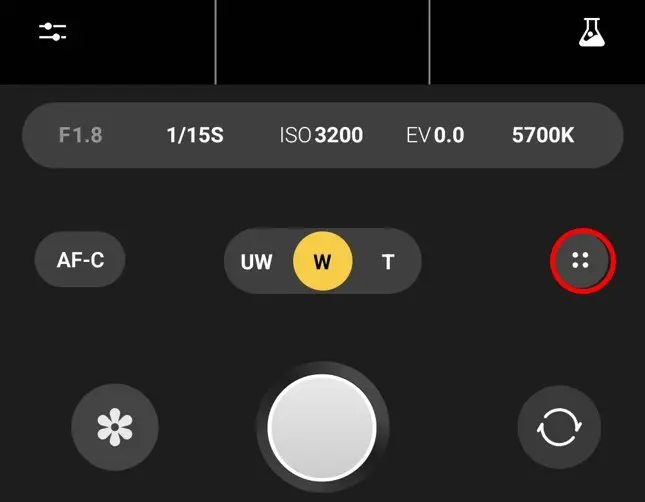
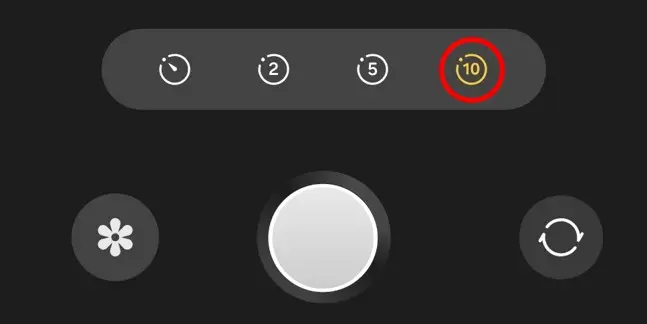
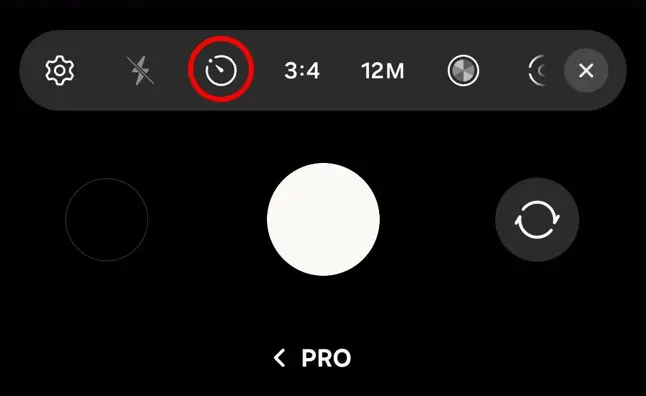
Step 2 If you don’t have a tripod: turn on a timer
Tap the Settings icon (looks like four dots in a circle on many models).
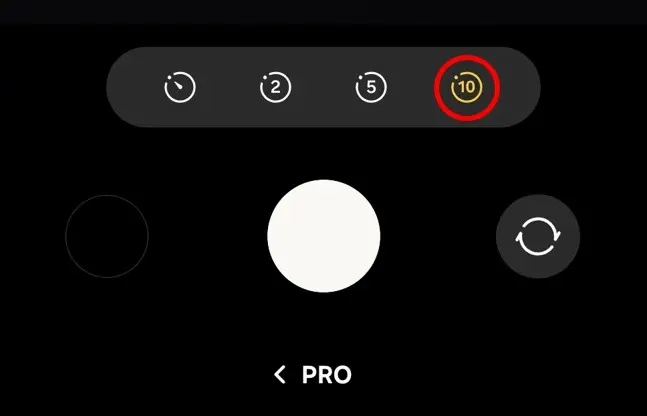
Turn on Timer → set to 10s.
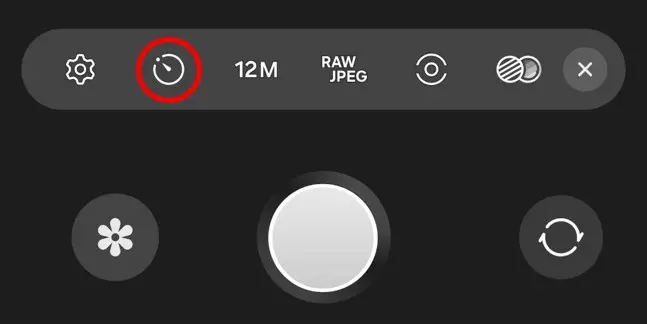
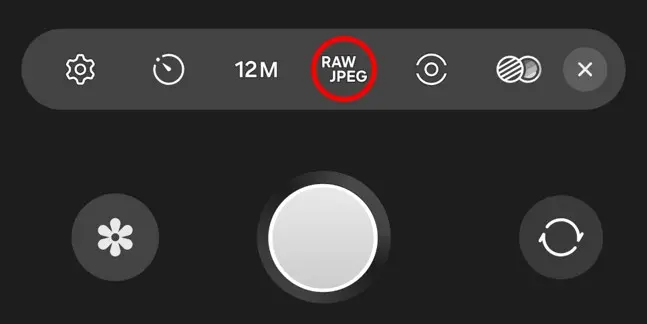
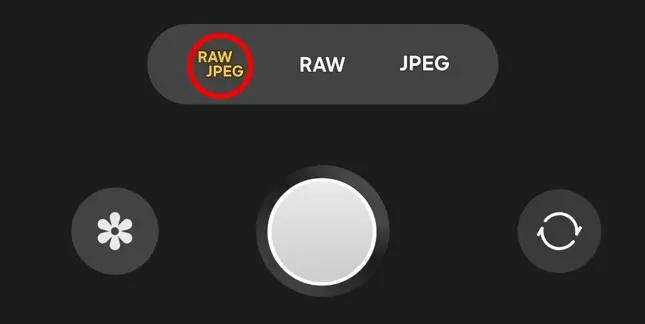
Step 3 Save RAW + JPEG
Tap RAW / JPEG → choose RAW + JPEG
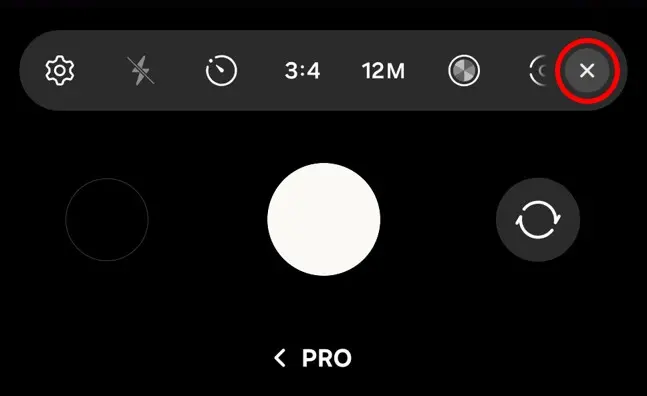
Then close settings (✕) to return.
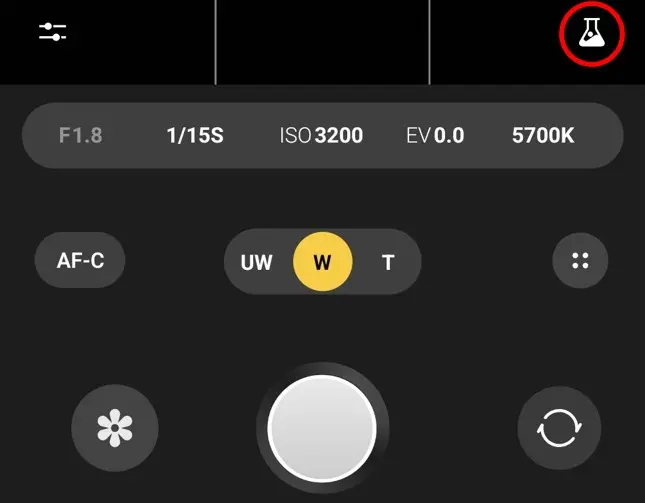
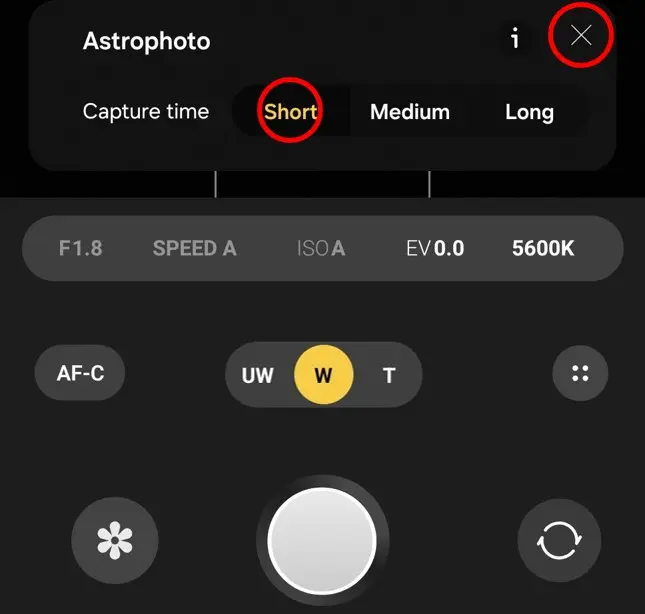
Step 4 Enable Astrophotography mode
Tap the Labs icon (flask) → Astrophotography → ON
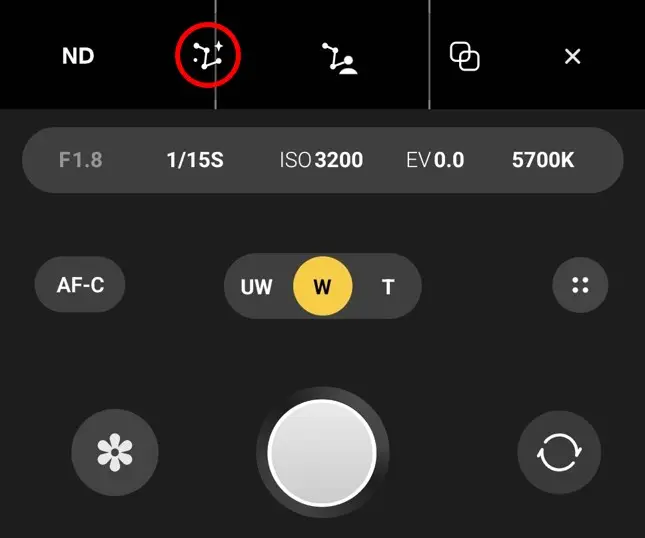
Step 5 Capture time: choose “Short”
Set Capture time to Short
(Long often doesn’t look dramatically better, and takes longer.)
Then close settings (✕) to return.
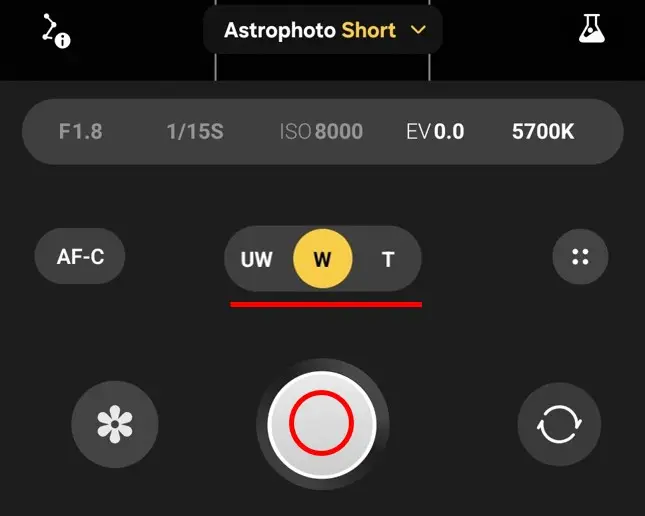
Step 6 Frame and shoot
Choose your lens / framing → press the shutter.
No tripod tip: after tapping shutter, place the phone firmly against a wall or on a stable support within the 10s timer.
Quick edit (built-in Gallery)
Open Gallery → Albums → Expert RAW → pick the photo
Tap Edit (pencil)
Adjust (light touch): Contrast / Highlights / Shadows
Save as a copy (Save copy)
2) Pro Mode — still great (often enough)
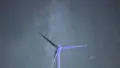
Shot on Galaxy S25 Ultra (Pro mode)
Step 1 Open Pro mode
Camera → More → Pro
Step 2 No tripod: timer again
Tap the Settings icon (four dots in a circle) → Timer → 10s → close (✕)

Step 3 Set ISO + Shutter speed
Set your framing first, then adjust ISO and Shutter.
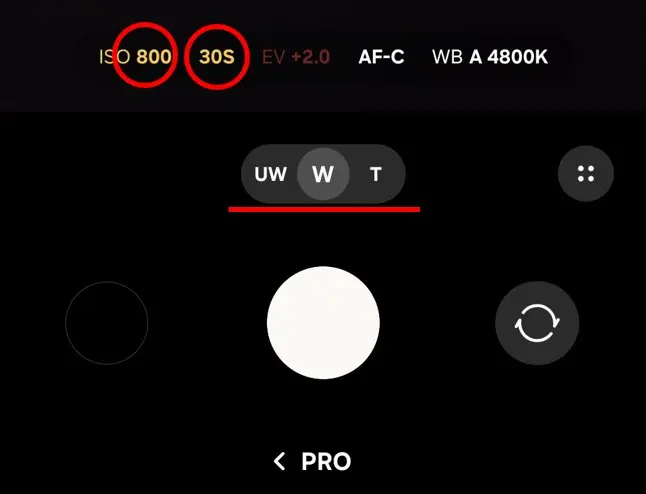
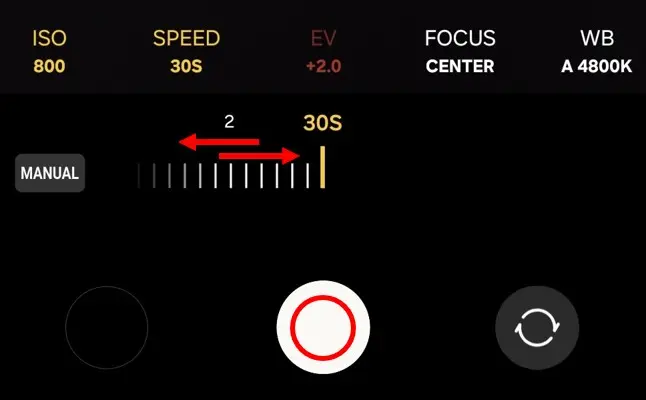
Important: Many guides say “ISO high + 30s shutter,” but on phones this can easily look worse. For details, see this link: [Galaxy Astrophotography: ISO 400 vs 1600 for Stars & the Milky Way (Why I Don’t Expose by the Viewfinder)]
Notes (small footer)
UI labels and icons may vary by One UI version and device model. The steps are written so you can match what you see on-screen.